Welcome to my kitchen! This is a blog that is evolving as my life does. I like food, but I don't have all the time in the world to cook. So lately, I'm going with simple, easy recipes. I may switch that up occassionally and post something time-intensive, but that isn't what I'm about these days. If that sounds like you - I hope you enjoy some of these recipes.

Showing posts with label dinner. Show all posts

Friday, September 3, 2010

Corned Beef Tacos

What do you get when you cross and Irishman and a Mexican?  Corned Beef Tacos!  Since marrying an Irishman I have learned to love corned beef.  And cabbage.  Something I'm sure my mom never thought would happen.  But since it has, I wanted to start using it more than just on St. Patrick's Day since it's so easy to make.  I like to cook it in my slow cooker, forget about it for 8 hours, then serve!


Corned Beef Tacos
Serves 4

1 6lb corned beef brisket
1 package soft white corn tortillas
cabbage, thinly sliced
thousand island dressing
horseradish (optional)


Cook your brisket along with it's juices from the package and spice packet in water (until just covered) in a slow cooker for 8 hours on low (or 4 hours on high, then one additional hour on low).  Remove the layer of fat then shred the brisket and keep set on 'warm' in the juices.


Warm the tortillas up in the microwave in a towel for 10-15 seconds.  Take your tortilla and layer the shredded corned beef, cabbage, thousand island and horseradish.  Serve!


It really is that easy and we thought this was a great combination of flavors.  It's a nice twist on a reuben, a taco, and corned beef and cabbage.   Oh, it's a little messy, so keep napkins handy!

Sunday, August 29, 2010

Butter Chicken

I love Indian food.  Why?  Because it almost always involves chicken and rice!  I have never tried Butter Chicken at a restaurant before but I thought it sounded interesting so I went ahead and tried it even though I had no idea what I was in store for.  It was good.  I wouldn't say I loved it but Jeff did!  So I am posting it anyway because I know this recipe is capable of people loving it and maybe that person is you! 


Indian Butter Chicken
source: Joelen of What's Cookin', Chicago?, slightly adapted by Amy's New Kitchen
serves: 6

Ingredients:


1 Tbsp vegetable oil
1 lb boneless, skinless chicken thighs, cut into bite-size pieces
1/2 tsp garam masala
1/4 tsp cayenne pepper


1 Tbsp vegetable oil
1 white onion, chopped
2 Tbsp unsalted butter
2 tsp fresh lemon juice
1 Tbsp ginger, finely grated
1 clove garlic, finely grated
1/2 tsp garam masala
1 tsp chili powder
1 tsp ground cumin
1 bay leaf
2 cups tomato puree
1 jalapeno, seeded and diced
1 cup heavy cream
1/4 cup plain yogurt
1/4 cup chopped fresh cilantro
1/4 teaspoon cayenne pepper
1 pinch salt
1 pinch black pepper
1/4 cup finely ground cashews


Heat 1 Tbsp oil in a large skillet over medium heat.  Add chicken and season with 1/2 tsp garam masala and 1/4 tsp cayenne pepper.  Cook until lightly browned, about 10 minutes. 


Meanwhile, prepare the sauce by heating 1 Tbsp oil in a large saucepan on medium high heat.  Saute onion until soft and translucent.  Stir in butter, lemon juice, ginger, garlic, garam masala, chili powder, cumin and bay leaf.  Cook, stirring for 1 minute.  Add tomato puree and jalapeno and cook for 5 minutes, stirring frequently.   Stir in cream, yogurt and cilantro.  Reduce heat to low, and add the browned chicken.  Simmer for 10 minutes, stirring frequently.  Season with salt and pepper to taste.  Just before serving, add the ground cashews and stir.  


Serve over steamed basmati rice.


 Does that not look awesome?  We had this with pita and Roasted Red Pepper Hummus!  More on that later! 

I made some slight changes to the amounts of ingredients from Joelen's version of this recipe.  There was a little too much garam masala for my taste so I halved it in my recipe.  I also added a jalapeno pepper because I think it would've added a little kick and really put this dish over the top!

Monday, August 23, 2010

Shredded Chicken

Tacos, tostadas, enchiladas, nachos, taco salad, and burritos are just a few things that I can think of that this chicken would be perfect for.  This was a really fresh dish since it uses fresh vegetables for flavor and not just a packet of taco seasoning mix to go with it.  We used the meat to make chicken tacos but there was so much leftover that we saved some for lunches the next day and froze some so that I can make chicken enchiladas when the weather starts to turn cooler.  And the chicken was so tasty I can't wait for those enchiladas!


Shredded Chicken
source: Food.com, slightly adapted by Amy's New Kitchen
servings: depends on what you're making with it.  About 8-10 servings.

Ingredients:
  • 4 boneless skinless chicken breasts  
  • 1/2 medium onion, sliced
  • 2 garlic cloves,  smashed
  • Tbsp sea salt 
  •  water
  • Tbsp butter
  • 1 garlic clove, minced
  • 1/2 medium onion, diced
  • 1 medium tomato, seeded and diced
  •  3/4 green bell pepper, diced 
  • 1 jalapeno, diced (seeded if you prefer less heat)
  • 1 1/2 tsp freshly grated black pepper
  • 1/4 cup cilantro, chopped
  • 2 tsp ground cumin
  • 1/4 cup tomato sauce 
  • 1 1/2 tsp sea salt
  • chicken broth (reserved) 
Place chicken, onion slices, garlic cloves and add just enough water to cover the chicken in a large pot.  Bring to a boil, cover and lower heat to a simmer.  Continue cooking for 25 minutes.


Remove chicken from broth, let cool, then shred.  Reserve the broth for later.


Meanwhile, while the chicken is cooling saute the butter, garlic clove, onion, tomato, bell pepper, jalapeno, pepper, cilantro, and cumin for 10 minutes.  Stir in shredded chicken then briefly saute.  Add tomato sauce, salt and 1/2 cup of chicken broth at a time until the chicken is as juicy as you like.

Monday, August 9, 2010

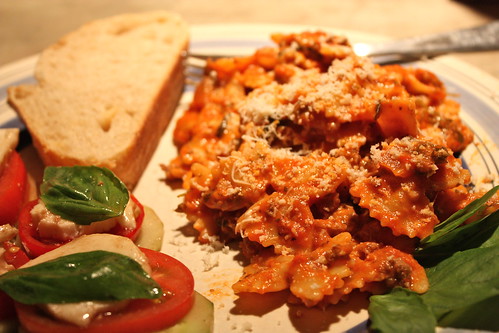
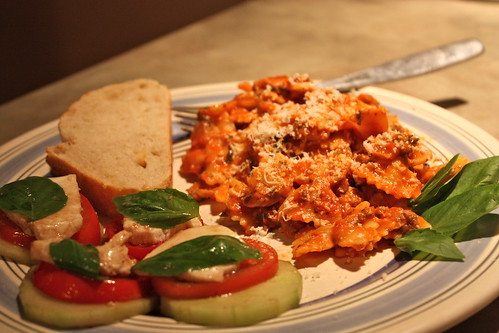
Bow-tie Lasagna

Everyone who loves lasagna knows the only thing that could make it better would be to be able to make it quicker!  :)  Well, this is a great solution to that problem.  It's not exactly like lasagna, but you get the idea from the flavors in the dish.


Bow-tie Lasagna
Source: Tasty Kitchen
Serves 6

Ingredients:
1 lb ground chuck
5 cups bow tie pasta
1 jar spaghetti sauce
1 Tbsp olive oil
1 tsp sea salt
1/2 tsp garlic powder
1 tsp garlic powder (I used about 1 1/2 tsp)
1/2 cup mozzarella cheese, shredded
1/2 cup sour cream


Fry ground chuck in small pan. Meanwhile, cook noodles according to package directions.


After noodles are cooked, drain and drizzle with olive oil. Mix in the spaghetti sauce.


Add the meat, salt, garlic powder cheese, and sour cream. Mix together until combined and cheese is melted.  Serve immediately.


We served this with a simple caprese salad and some roasted garlic bread and it was perfect for a quick weeknight meal.  It really does taste like lasagna and makes great leftovers.  I'm a fan of this dish, a big one.

Wednesday, July 28, 2010

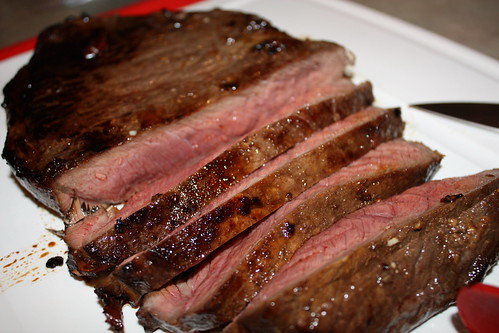
London Broil with Cherry Balsamic Sauce

This was a great dinner to make on a weeknight.  Because it's easy, quick, and filling!  The sauce is absolutely delicious and compliments the meat perfectly.


London Broil with Cherry Balsamic Sauce
Source: Food Network
Serves 6

Ingredients:
(I recommend doubling this top batch of ingredients and then dividing them)
1/3 cup, dry red wine
1/4 cup balsamic vinigar
2 Tbsp cherry preserves
2 cloves garlic, minced
1/2 tsp sea salt
Freshly ground black pepper, to taste


1 1/2 lbs London Broil
1 shallot, finely chopped
1 tsp olive oil
2 tsp butter


Whisk wine, vinegar, cherry preserves, garlic, salt and pepper in a small bowl. Place meat in a shallow glass dish. Pour the marinade over the meat and turn to coat. Cover and marinate in the refrigerator, turning several times, for at least 1 hour (or up to 8 hours).


Remove the meat from the marinade. Pour the marinade into a small saucepan (I made a second batch and threw this original marinade away); add shallot and set aside. Oil a cast iron skillet and heat on medium-high. Add the meat and cook for 6 to 8 minutes per side for medium-rare, or until it reaches desired doneness. (Cooking time will depend on thickness.  It may appear that the meat is burning but don't worry, it will form a pleasant crust.) Transfer meat to a cutting board and let rest for 5-10 minutes.


While the meat is cooking, bring the marinade to a boil.  Cook over medium-high heat for 5 to 7 minutes, or until it is reduced to about 1/2 cup. Remove from the heat; add butter and whisk until melted.


Slice meat thinly against the grain. Add any juices on the cutting board to the sauce. Serve the meat with the sauce drizzled on top.


This was really great and serves plenty!  I love doing London Broils because start to finish (not including the marinade time which I recommend doing for as long as you can.  It will really help this tough cut of meat to tenderize and become that much more flavorful!) this meal takes less than 30 minutes.  It doesn't get much easier than that and it tastes amazing.  The flavors really mesh in the sauce and makes the house smell spectacular.

Monday, July 12, 2010

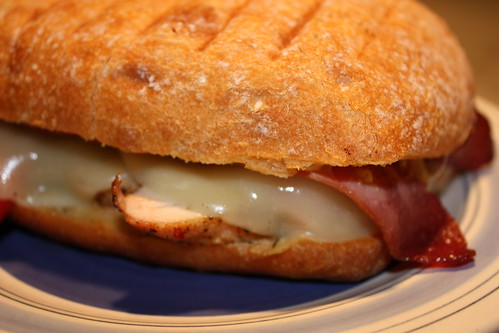
Chicken, Provolone & Roasted Red Pepper Panini

Whenever I have leftover meats from the grill I try to do something new so we aren't necessarily eating the same meal again the next day.  I had a leftover grilled chicken breast from the other night and wanted to try my hand at creating a panini.  And I think it just might be a new addiction. I am definitely going to keep checking out this Panini Blog for inspiration!  All paninis, all the time.


Chicken, Provolone & Roasted Red Pepper Panini
Source: Panini Happy, adapted by Amy's New Kitchen
Serves 4

Ingredients:
1 loaf ciabatta bread
Hummus
Fresh Dill
1 large Chicken Breast, seasoned and grilled, sliced lengthwise
1 Roasted Red Pepper, sliced lengthwise
6 slices deli-style Provolone Cheese
8 slices Turkey Bacon, cooked (optional)


Slice ciabatta loaf in sections perfectly sized to your liking.  Slice in half and spread a generous amount of hummus onto the inside of each slice.  Sprinkle freshly chopped dill onto hummus on both sides of bread again.  Then layer on the bottom slice of ciabatta, chicken, roasted red pepper slices, provolone then bacon.  Top with the top half of ciabatta bread.


Grill sandwiches for ~5 minutes on each side of bread.  The cheese will melt and nice grill marks should form on both sides of the bread.


Look at that gooey awesomeness!!  I used a cast iron grill pan on my stove top and another cast iron pan on top of the sandwiches weigh them down and keep them in place while grilling.  I'm sure it works better if you have a panini press but my way got the job done.  And since it did work- that means I can make grilled paninis any season of the year!

Tuesday, July 6, 2010

Jambalaya

I make a lot of chicken and rice.  I'm not gonna lie.  But I'm always trying to come up with more flavorful ways to cook it.  Jambalaya seems to fit that bill!


Jambalaya
Original recipe: Cooking Light  Adapted by Amy's New Kitchen
Serves 5

Ingredients:
  • 2 tsp vegetable oil
  • 1 cup chopped onion
  • 1/2 cup green bell pepper, chopped
  • 1/2 cup red bell pepper, chopped
  • 2 jalapenos, seeded and chopped
  • 3 cloves garlic, minced
  • 1 3/4 cups uncooked, long-grain white rice
  • 3 cups low-sodium chicken broth
  • 2 tsp paprika
  • 1 tsp oregano
  • 1 tsp freshly ground black pepper
  • 1/2 tsp dried thyme
  • 1/4 tsp  ground cayenne pepper
  • 1 bay leaf
  • 1 tsp of your favorite hot sauce (or to taste)
  • 1 can (14.5 oz) diced tomatoes, undrained
  • 1 can (6 oz) tomato sauce
  • 2 boneless, skinless chicken breasts, seasoned then grilled and cut into bite-sized pieces
  • 3 beef smoked sausages, grilled and cut into bite-sized pieces
Heat oil in a a dutch oven over medium-high heat.  Add onion, bell peppers, jalapenos and garlic and saute 5 minutes or until vegetables are becoming tender.


Stir in rice, cook 2 minutes, stirring constantly. Add broth, paprika, oregano, black pepper, thyme, cayenne pepper, bay leaf and hot sauce; bring to a boil. Cover, reduce heat, and simmer 15 minutes. Add chicken, sausage, tomatoes and tomato sauce; cook, uncovered, 5-10 minutes or until liquid is absorbed.  Remove from heat and remove bay leaf.  Let stand 5 minutes.


This is a fun and easy recipe that is a great weeknight meal.   It's not too spicy but has a nice kick to it that won't let you down.  Make some cornbread, or maybe some Garlic Cheddar Biscuits on the side and you've got yourself a seriously delicious meal! 

Friday, June 25, 2010

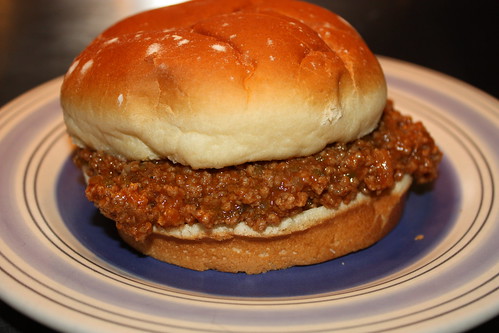
Sloppy Joes

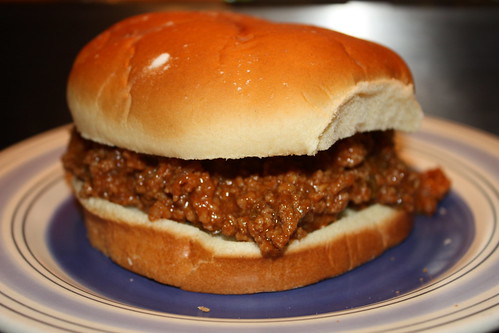
Now I know where they get their name from! Just try and keep the meat from falling out of the bun, I dare you! But seriously-these are awesome. I don't even know the last time I had a Sloppy Joe, but they're delicious and so easy! They're going in to our summer rotation for sure.


Sloppy Joes
original recipe from Allrecipes.com, slightly adapted by Amy's New Kitchen
serves 4

Ingredients:
1 pound lean ground beef
1/2 cup chopped onion
1/2 cup chopped green bell pepper
1/2 teaspoon garlic powder
3/4 cup ketchup
1 tsp prepared yellow mustard
1 tsp spicy brown mustard
1 tsp soy sauce, low sodium
3 teaspoons brown sugar
1 tsp of your favorite hot sauce
salt to taste
freshly ground black pepper to taste

In a medium sauce pan over medium heat, brown the ground beef, onion, and green pepper; drain off any liquids.


Add in garlic powder, ketchup, both mustards, soy sauce, brown sugar, and hot sauce; mix thoroughly. Reduce heat to low and simmer for 30 minutes. Season with salt and pepper.


These would be so easy to make and throw in a slow cooker (on warm) for a party or get together. They have a ton of flavor and are incredibly simple. Great for a quick weeknight meal on a budget too.

Wednesday, June 23, 2010

Stuffed Bell Peppers

There is nothing like a good stuffed bell pepper.  I've been messing around with the ingredients in my recipe and so far, this is my favorite combo.


Stuffed Bell Peppers
Serves 6

1 lb lean ground beef
1/2 cup chopped onion
1/2 cup frozen whole kernel corn
1 packet Garlic and Herb salad dressing mix
1 can tomato sauce
1/2 cup water
1 cup cooked rice
1 cup Monterey Jack cheese, shredded
6 bell peppers


Brown the ground beef, onions, and corn until the meat is no longer pink.  Drain any grease.  Add the packet of Garlic and Herb salad dressing mix, tomato sauce, water, rice and about 1/4 cup of the shredded cheese.  Stir to mix.  Let simmer until sauce thickens.


Preheat oven to  350Âş


Cut the tops off the bell peppers and remove the seeds.  Stuff the peppers with the beef mixture and top with the remaining cheese.  Add one cup of water to the bottom of a baking dish.  Place peppers in dish and cover and bake in the oven 30-45 minutes depending on the size of the peppers.  Remove cover halfway through cooking.


Sometimes if we want a little charring for flavor on the peppers we will cut the baking time, then grill them for about 10 minutes until they're tender.  So good!


Tuesday, June 8, 2010

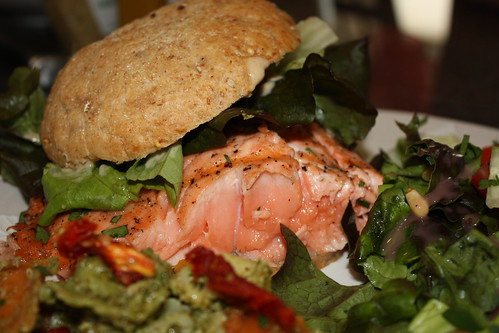
Grilled Glazed Salmon Sandwiches

For Mother's Day my brother and I didn't want to just grill up some chicken and serve it.  We wanted to make something special and colorful-just like our mom.  It just so happens that my trusty subscription of Food & Wine was delivered the day we were talking about what to make!


Grilled Glazed Salmon Sandwiches
recipe from the June 2010 issue of Food & Wine magazine
serves 4

1/4 cup plus 2 Tbsp Dijon Mustard
1/4 cup prepared horseradish, drained
2 Tbsp honey
Four 6 oz skinless salmon fillets
Vegetable oil, for rubbing
Salt
Freshly ground black pepper


In a small bowl, combine the mustard, horseradish, and honey.  
Rub the salmon with oil then season with salt and pepper.  Grill salmon over moderate heat skin side down, until lightly brown.  Rotate and continue grilling until salmon is almost fully cooked through.  Rotate again and brush about 1 Tbsp of the horseradish glaze onto each fillet.   Continue cooking until glaze is set and salmon is done cooking-about 30 seconds and remove from heat.


Serve on a roll with greens of your choice and the rest of the horseradish glaze on the side.


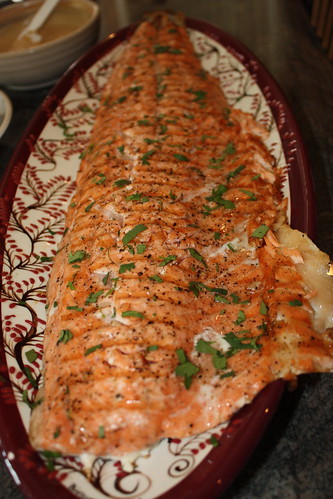
My mom loves salmon.  And I'm not sure how often her and her husband grill it-so I thought this was the perfect meal.  Everyone said it was delicious, and I'll have to take their word for it because I can't eat fish.  Instead of using individual fillets like the recipe suggests, I bought a huge salmon fillet from the deli and we cut each fillet to fit the bread roll.  It worked out really well and the portions were perfect.

Wednesday, May 12, 2010

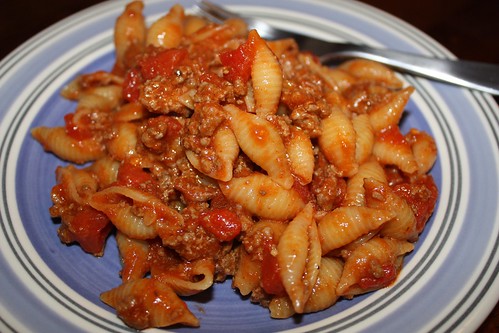
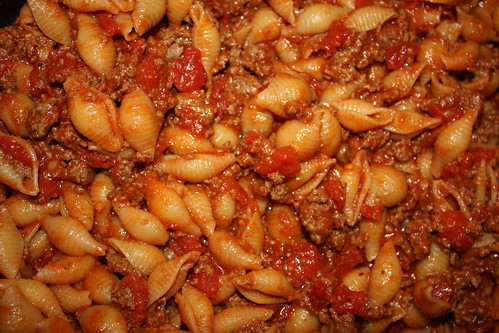
Grandpa's Goulash

I miss my Grandpa.  He passed away when I was little.  There are 2 things that I remember about my Grandpa though.  He made me sausage and eggs for lunch almost every single day I saw him, and he made the best goulash.  My mom recently brought over her recipe box of family recipes for me to go through and copy the ones I wanted.  Grandpa's Goulash was the first one I hunted down.  One other thing about my Grandpa though-all his recipes are to taste.  No measurements.  So, I will be experimenting until I get them all right.  And I will share the love of my Grandpa with all of you!


Goulash
Serves 8

Ingredients:
2 lb 93% lean Ground Beef
1 lb Shell Macaroni
Sea Salt
Pepper
1 Tbsp Garlic Powder
1/4 cup A-1 Steak Sauce
1/4 cup Heinz 57 Sauce
2-3 Tbsp of your favorite hot sauce
1 Tbsp Worcestershire Sauce
1 28oz can Petite Diced Tomatoes
1 6oz can Tomato Paste


Cook pasta as directed on package in salted water.  While the pasta is cooking, salt and pepper then start browning the meat in a large pot.  When meat is slightly browned, add garlic powder, A-1, Heinz 57, hot sauce, Worcestershire sauce, and the entire can of tomatoes with juices.  Continue cooking until meat is thoroughly cooked then simmer.  Add can of tomato paste and blend completely into the meat mixture.  Drain shells, do not rinse them, then add them to the meat mixture.  Let simmer about 30 minutes to let the flavors blend.


I really needed some comfort food tonight.  It's currently raining outside and it's about to start snowing....yep-almost halfway through May.  I'm ready for summertime!  But until mother nature is too, I will use this rainy day to make some amazing food that warms my heart....and my belly.

Friday, May 7, 2010

Bacon-Wrapped Pork Medallions in Red Wine and Rosemary Sauce

There is a judge frequently on Iron Chef America who swears that bacon makes everything taste better.  I wanted to test that theory so I bought 4 packages of bacon the last time I was at the grocery store.  Ok, not just because of the judge on Iron Chef America-but because it was on sale, BOGO, and I eat turkey bacon and Jeff likes the regular stuff.  Ok, OK, I admit we might have a problem.  Let's figure out a way to solve it....  Pork wrapped in bacon!!  Jeff always says there is nothing better for dinner than meat and meat!


Bacon-Wrapped Pork Medallions with Red Wine and Rosemary Sauce
adapted from Cook's Illustrated, The New Best Recipe by way of Pink Parsley

Ingredients:
1 pork tenderloin, trimmed of excess fat (mine was 1.5lbs)
sea salt
pepper
10 slices bacon, thick cut or Applewood smoked
1 Tbsp olive oil
3/4 red wine
2/3 cup low-sodium chicken broth
2 tsp rosemary
1 bay leaf

Arrange bacon in a single layer on a cooling rack that is placed on top of a baking sheet with 4 sides.  Bake at 400 degrees for 13 minutes.  Remove from oven, blot excess grease with a paper towel and let cool on cooling rack.

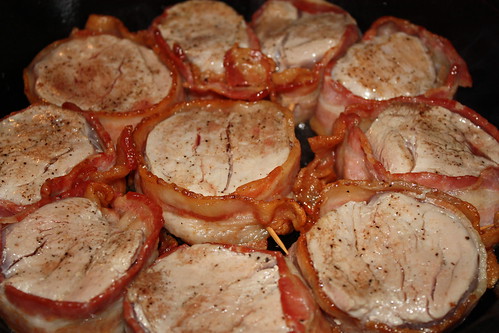
Meanwhile, slice the tenderloin into 1" thick pieces.  Season both sides with salt and pepper and then wrap each medallion with one slice of bacon.  Secure bacon with a toothpick.

Heat oil in cast iron skillet until you see light whisps of smoke come from the oil.  Sear medallions until nicely browned on each side, about 2 minutes per side.  Feel free to do these in batches if they don't all fit in your pan.  Transfer medallions to a plate.

In the same skillet over medium-high heat, pour in the wine (I used a Malbec).  Cook, scraping the browned bits from the bottom of the pan with a wooden spoon, until the wine has reduced to about 2-3 Tablespoons.  This took me about 6-7 minutes.

Increase heat to high and add the chicken broth, rosemary and bay leaf to the reduced wine sauce.  Cook until this sauce is reduced to a thicker consistency, about 3-5 minutes.  Place the pork medallions back in the wine sauce, and add any juices from the plate as well.  Continue cooking, about 3 minutes, to heat and cook the pork through, turning once to coat each medallion with the sauce.

Transfer to a plate, remove the toothpicks, spoon additional sauce over each piece if you like and serve immediately with your favorite sides. 

The meat smelled delicious while cooking.  The medallions went from this:

To this:

To served up in the sauce on a plate:

The meat was so tender.  I didn't even think that pork could become that tender from being cooked on the stove top in such a short amount of time, but it was absolutely melt-in-your-mouth delicious.  I will be making this dish again and again and again.  We loved every bite.

From the original recipe I omitted the cherries completely, substituting a bay leaf instead and altered the cooking times slightly.  I'm not sure if it was the higher altitude, but the times needed extending for the pork to cook through fully.

Wednesday, April 21, 2010

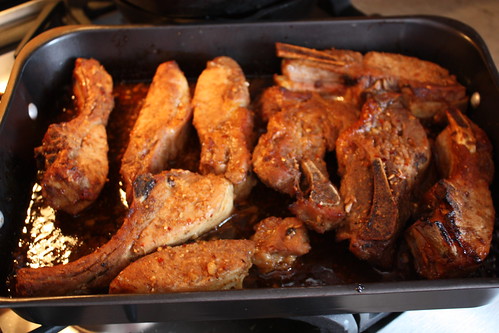
Emeril's Pork Ribs (AKA Sweet n' Spicy Ribs)

This was a pretty nice change from your everyday, bbq ribs.  I really liked the sweetness of the sauce, with a little heat from the cayenne pepper and the crushed red chili peppers, it makes such a great combo.  I served these ribs with rice, which is my all-time favorite food.  I loved this dinner.   Want the original recipe?  Check out Food Network.


Emeril's Pork Ribs
Original recipe by Emeril Lagasse, slightly adapted by Amy's New Kitchen
Serves 4

Ingredients:
  • 2 (3-pound) slabs country-style pork ribs, sliced into individual ribs
  • 2 teaspoons sea salt
  • 2 cups Steen's 100% pure cane syrup or other cane syrup
  • 1/4 cup soy sauce
  • 1/4 cup apple cider vinegar
  • 1/2 cup water
  • 2 tablespoons sesame oil
  • 1/4 cup minced yellow onion
  • 2 tablespoons chopped garlic
  • 2 tablespoons peeled and grated fresh ginger
  • 1 teaspoon cayenne 
  • 2 tablespoons crushed red pepper flakes
  • 1/4 teaspoon freshly ground black pepper
  • Scallions (green parts only), thinly sliced on the bias, for garnish
Put the ribs in a very large soup pot or kettle. Add the salt and enough water to cover them. Bring to a boil and let boil for 30 minutes. Remove from heat and drain.

Whisk the remaining ingredients together in a medium-size mixing bowl, blending well. Put the ribs in a large, deep braising pan or roasting pan and pour half of the marinade over them. Cover and refrigerate for 2 to 3 hours, turning the ribs in the marinade every hour.

Preheat the oven to 350 degrees F.
Cover with foil and cook, basting with the reserved marinade and turning the ribs every 15 minutes, for 1 to 1 1/2 hours.

Remove the ribs from the pan.  Spoon some of the sauce from the pan onto the top of each rib and garnish with sliced scallions when serving.


These make your kitchen smell absolutely amazing while they are in the oven.  I was so hungry by the time they were done I could have eaten 3 of them!  We didn't have the Steen's pure cane syrup so I actually used 1 cup of maple syrup.  I'm sure that affected the taste of the original recipe, so to compensate I doubled the cayenne and added red pepper flakes (all noted in the above recipe.)

Monday, April 19, 2010

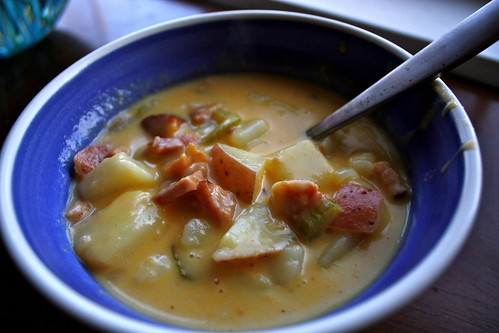
Cheesy Potato and Ham Soup

I wanted a satisfying, warm soup one cold night so we decided to try this recipe out.  And we've made it twice since.  It is also a nice way to use up that left over New Year's or Easter ham!  The inspiration for this dish came from a recipe at Allrecipes.com called Golden Potato Soup.


Cheesy Potato and Ham Soup
Serves 8

Ingredients:
3 1/2 cups potatoes, peeled (if you like) and cubed
1/2 cup celery, chopped
1/3 cup onion, finely chopped
2 Tbsp chicken bouillon granules or 1 chicken bouillon cube
3 cups water
1 Tbsp dried parsley
1/2 tsp sea salt
1 Tbsp freshly cracked black pepper
1 tsp cayenne pepper
5 Tbsp flour
5 Tbsp butter
2 cups milk
2 cups cheddar cheese, shredded
2 cups ham, cooked and diced


Combine the potatoes, celery, onion, ham and water in a large pot and bring to a boil.  Cook over medium to medium-high heat until the potatoes are tender.  Add in the chicken bouillon granules along with the salt, pepper, and cayenne pepper - stir.


In a separate large pot (I like to use my dutch oven), melt butter over medium heat and whisk in your flour until a nice roux forms.  Add in the parsley and stir.  Slowly pour in the milk while continuing to whisk so that no clumps form.  Continue stirring constantly until mixture thickens. (Just a few minutes)


Add the cheese slowly and stir until completely melted.  Add the potatoes, ham, and water mixture to the cheese.  Stir until your soup is well blended.


The first time I made this soup I peeled the potatoes.  Just for fun-the second time I made it, I used New Potatoes and didn't peel them.  It was good both ways, but the peeled potatoes definitely made a more traditional soup.  But I like the color the New Potato peels provide when you don't peel them.
Either way-this is a comforting dinner that we will make again and again on those cold winter nights!

Wednesday, March 24, 2010

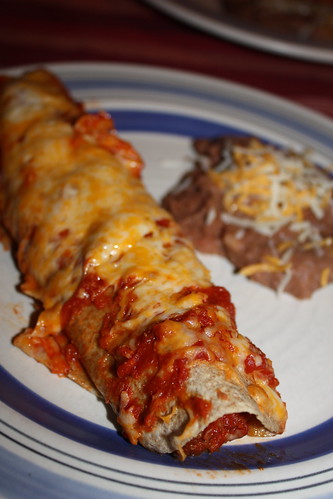
Pulled Pork Enchiladas

I love mexican food!  It might be my favorite genre of food.  Although, I have lots of favorites when it comes to food.....so that would be a really hard call to make.  I do love enchiladas though.  And I think they're even better homemade.

As a child I was pretty much allergic to everything under the sun.  I was lucky that I wasn't allergic to the sun.  One of the things I haven't quite outgrown is corn.  So, I have to substitute some ingredients every once in a while when I can.  In this recipe, for instance, I use whole wheat tortillas instead of traditional corn tortillas.  They give off a great flavor and crisp up on the ends just like the corn ones do.  Fantastic.


Pulled Pork Enchiladas
Serves 4


Ingredients:
2 8oz cans tomato sauce
1 6oz can tomato paste
2 Tbsp minced onions
1 1/2 Tbsp chili powder
2 1/2 tsp garlic powder
1 1/2 tsp cumin
1/8 tsp sea salt
4 Tbsp olive oil
1/2 cup water
2 cups shredded cheese (I used Monterey Jack and cheddar)
1 lb pulled pork, cooked
8 10" whole wheat tortillas


In a medium saucepan combine the tomato sauce, paste, onions, chili powder, garlic powder, cumin, salt, olive oil and water.  Stir and let simmer for about 15-20 minutes.


Reserve 1/2 cup of your sauce for topping the enchiladas with.  Add the cooked pulled pork to the rest of sauce and let simmer about 5 more minutes.  


Preheat your oven to 350 degrees.  


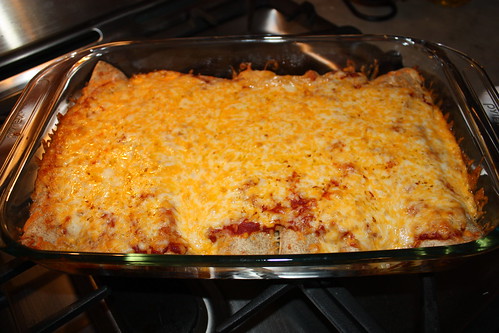
Prep a 9x13" glass dish with a spritz of olive oil on the bottom.  This will help to crisp up the wheat tortillas a bit.  Take one of your tortillas and fill the middle with 1/8 of the meat and approx. 3 tbsp cheese sprinkled onto the meat.   Roll up the tortilla and place in the glass pan seam side down against one end of the pan.  Repeat with the rest of the tortillas, setting each right next to the last.  All 8 tortillas should fit snuggly into the dish.  Top the entire dish with the 1/2 cup of sauce that was set aside.  Top with the rest of the shredded cheese and bake for 25 minutes.


Depending on your tomato sauce and how thick it is straight out of the can, you add less water or more water to your enchilada sauce until you acquire the thickness you desire.  Not too thick, not too thin.  Juuuuuust right.

These were delicious and fresh.  I served them with some refried beans topped with a tiny splash of shredded cheese.  I love the flavor of the homemade sauce.  The stuff from a can just never appeals to me.  It doesn't taste like enchilada sauce-maybe because growing up my dad always made his own.  This is so quick and easy, there is no excuse to use the pre-made stuff.

Saturday, March 20, 2010

Salsa Chicken

A chicken and rice recipe?  Now we're talking!  I have heard lots of good things about this recipe, how easy it is, how awesome the flavor is....  I also heard a rumor that you can take a Pampered Chef Deep Covered Baker and put chicken in it-cook it in the microwave for 20 minutes and you will get delicious, juicy chicken every time. Are both of these rumors true?  I'm about to find out! 


Normally, this recipe is made in a slow cooker, for 8 hours on low.  I was inspired by Dunne's recipe at With a Cherry on Top for my own adaptation of this dish.  Her way you get amazing chicken that is easily shredded for tacos, burritos, enchiladas, tostadas, nachos, etc.  The way I did it, was quick and easy-but the chicken won't be easily shredded-but it will be oh, so delicious and full of flavor.   


We served it over rice:


Salsa Chicken
Serves 5


Ingredients:
5 Chicken Breasts
1 16oz  Jar of your Favorite Salsa
1 can (10oz) Cheddar Cheese Soup
1 packet Taco Seasoning (or your own Taco Seasoning)
Your favorite hot sauce


Place the chicken on the bottom of the Deep Dish Baker.  In a separate bowl mix the can of cheddar cheese soup and the jar of salsa along with the taco seasonings.  Cover your chicken with the mixture and turn your chicken pieces over to get both sides covered with your sauce.  Add a few dashes of your favorite hot sauce to each chicken breast.  Cover and microwave on high for 18-20 minutes.


That's it!


This is what the chicken will look like when it's all done cooking.  (I took out 2 pieces of the chicken before I took this picture.)  It is the easiest meal I've ever made.   It is a bit on the spicy side, but that's the way we like it.   You can make it as spicy or as mild as you would like by choosing a mild salsa, a medium salsa or a hot salsa.  The addition of the hot sauce can be omitted completely.  Also, if you aren't feeling it, you don't need to make your own taco seasoning.  Grab a packet at the grocery store and throw that in instead!  This recipe can be made for you!  And it's easy no matter which way you make it.


This meal was completely done in less that 25 minutes.  Now that's an easy dish!

Taco Seasoning

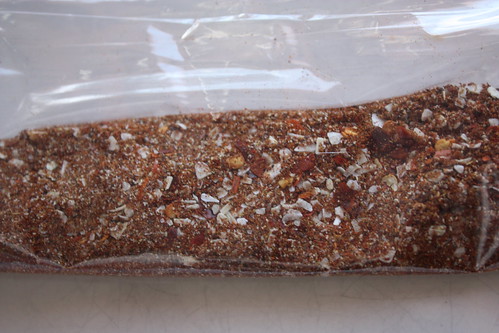
I've started to experiment with making my own taco seasoning since I'm not into paying $1+ for a packet of taco seasoning.  And I usually think there is too much salt in the pre-packaged ones as well.  At least they make low sodium packets now.  Anyway-I've found a mix of seasonings that I'm really liking now.  Here it is:


Taco Seasoning
(This is for 1lb of ground beef or chicken)

Ingredients:
1 Tbsp chili powder
2 tsp minced onions
1 tsp cumin
1 tsp crushed red pepper  (I like to grind them up in my mortar and pestle before I add them to the mix)
1 tsp garlic powder
1/2 tsp paprika
1/2 tsp sea salt
1/2 tsp pepper

Mix all your ingredients together until well blended.  I like to mix them up in my mortar and pestle since it's already out to crush my red pepper flakes even more.  Store in an air-tight container or use immediately.  Use as much or as little as you like.   


Don't forget to drain your meat of all the grease, and also add 3/4 cup water when adding the taco seasoning.  Simmer until water is mostly absorbed and the meat is well seasoned.  

This is a great base for your tacos.  I also like to add a few dashes of our favorite hot sauce onto the meat when I add the spices for a little extra kick.  So yummy!  

Thursday, March 18, 2010

Corned Beef and Cabbage

Happy St. Patrick's Day everyone!!  


What says St. Paddy's day more than corned beef and cabbage?  Funny story-as a kid this was the ONE meal that my mom would actually let me take a pass on, and I was allowed to eat a peanut butter and jelly sandwich instead.  I despised corned beef and cabbage growing up.  And thought I couldn't stand it until about 3 years ago at a friends house when I tried it again.  Delicious!!!

So, since the husband is Irish, well I guess I am now too-I figured I better learn how to make it.  Last year was my first foray into making this meal and it came out really good.  So I decided to make it again.  I guess this will be our SPD tradition!

Corned Beef and Cabbage
Serves 6


Ingredients:
4.5lb flat cut corned beef brisket
1 head cabbage
8 new potatoes, skin on, cubed


Put your brisket in the slow cooker, fat side down.  Take the spice packet that comes with the brisket and sprinkle on top and around your corned beef.  Cover the meat with water until there is about an inch of water above the top of the meat.  Cook on low for 8-10 hours.  


Take the cooked brisket and remove from your slow cooker.  Remove the fat layer then cut and shred your meat.  Cut up your cabbage, separate the pieces and place into the broth already in the slow cooker.  Cut up your potatoes with the skin still on and add to the slow cooker.  Put your meat on top and mix it all up.  (You can add more hot water if you need to-the cabbage will cook down a bit so don't add too much.)  Cook for another 1 1/2 to 2 hours on low.  Taste the potatoes and when they are done to your liking serve it up!


Side note: I used my fairly large slow cooker (6.5 qt) for this recipe.  You might need to cut down on some of the ingredients if yours is on the smaller side.

Sláinte!

Tuesday, March 16, 2010

Italian Chicken Pasta Toss

This pasta creation was inspired by the angel hair pasta dish at The Cheesecake Factory that I absolutely love.  I haven't had it in far too long, so this recipe I'm sure doesn't taste much like the actual dish-but it is really yummy anyway!


Italian Chicken Pasta Toss
Serves 4

Ingredients:
3  chicken breasts
3 cloves garlic, chopped
1 box angel hair pasta-cooked to al dente
Italian dressing packet, prepared
3 roma tomatoes, chopped
1 can quartered artichoke hearts in water, drained
2 tsp italian seasoning
1 1/2 tsp freeze dried chives (or fresh-I had dried so that's what I used)
1 1/2 tsp oregano
1 1/2 Tbsp dried basil
fresh parmesan to top off the dish


Cook your chicken in a skillet with ~2 tsp olive oil.  I added the garlic and about 1/2 tsp of the italian seasoning onto the chicken about 3 minutes before it was done cooking.  Heat your water and cook your pasta while the chicken is cooking to save time.


Chop the tomatoes and halve the quartered artichoke hearts and set aside in a bowl.  Prepare the italian dressing as directed.  I used olive oil and apple cider vinegar.  Cut the chicken into nice, bite size pieces and add to the vegetables along with the garlic from your skillet.


Rinse the angel hair pasta in cold water and find a big bowl to put it in.  Add the chicken, artichoke hearts, and the tomatoes to the pasta.  Sprinkle the italian seasoning, chives, oregano, and basil onto the dish-then pour the dressing on and stir it all up!  Cover and refrigerate for about an hour.


When ready to serve, plate the dish into a nice pasta bowl and grate some fresh parmesan cheese on the top!


Letting the pasta sit for that additional hour really lets all the flavors mesh together.  You can serve this dish as soon as you mix it up, since the pasta is already cold from the running water, but I like to let it sit and I also think it tastes better a little colder.

This is a fantastic summer dish.  It is so easy to make and can be completely ready in less than 15 minutes.  You can't beat that!