Welcome to my kitchen! This is a blog that is evolving as my life does. I like food, but I don't have all the time in the world to cook. So lately, I'm going with simple, easy recipes. I may switch that up occassionally and post something time-intensive, but that isn't what I'm about these days. If that sounds like you - I hope you enjoy some of these recipes.

Showing posts with label lunch. Show all posts

Friday, September 3, 2010

Corned Beef Tacos

What do you get when you cross and Irishman and a Mexican?  Corned Beef Tacos!  Since marrying an Irishman I have learned to love corned beef.  And cabbage.  Something I'm sure my mom never thought would happen.  But since it has, I wanted to start using it more than just on St. Patrick's Day since it's so easy to make.  I like to cook it in my slow cooker, forget about it for 8 hours, then serve!


Corned Beef Tacos
Serves 4

1 6lb corned beef brisket
1 package soft white corn tortillas
cabbage, thinly sliced
thousand island dressing
horseradish (optional)


Cook your brisket along with it's juices from the package and spice packet in water (until just covered) in a slow cooker for 8 hours on low (or 4 hours on high, then one additional hour on low).  Remove the layer of fat then shred the brisket and keep set on 'warm' in the juices.


Warm the tortillas up in the microwave in a towel for 10-15 seconds.  Take your tortilla and layer the shredded corned beef, cabbage, thousand island and horseradish.  Serve!


It really is that easy and we thought this was a great combination of flavors.  It's a nice twist on a reuben, a taco, and corned beef and cabbage.   Oh, it's a little messy, so keep napkins handy!

Monday, August 23, 2010

Shredded Chicken

Tacos, tostadas, enchiladas, nachos, taco salad, and burritos are just a few things that I can think of that this chicken would be perfect for.  This was a really fresh dish since it uses fresh vegetables for flavor and not just a packet of taco seasoning mix to go with it.  We used the meat to make chicken tacos but there was so much leftover that we saved some for lunches the next day and froze some so that I can make chicken enchiladas when the weather starts to turn cooler.  And the chicken was so tasty I can't wait for those enchiladas!


Shredded Chicken
source: Food.com, slightly adapted by Amy's New Kitchen
servings: depends on what you're making with it.  About 8-10 servings.

Ingredients:
  • 4 boneless skinless chicken breasts  
  • 1/2 medium onion, sliced
  • 2 garlic cloves,  smashed
  • Tbsp sea salt 
  •  water
  • Tbsp butter
  • 1 garlic clove, minced
  • 1/2 medium onion, diced
  • 1 medium tomato, seeded and diced
  •  3/4 green bell pepper, diced 
  • 1 jalapeno, diced (seeded if you prefer less heat)
  • 1 1/2 tsp freshly grated black pepper
  • 1/4 cup cilantro, chopped
  • 2 tsp ground cumin
  • 1/4 cup tomato sauce 
  • 1 1/2 tsp sea salt
  • chicken broth (reserved) 
Place chicken, onion slices, garlic cloves and add just enough water to cover the chicken in a large pot.  Bring to a boil, cover and lower heat to a simmer.  Continue cooking for 25 minutes.


Remove chicken from broth, let cool, then shred.  Reserve the broth for later.


Meanwhile, while the chicken is cooling saute the butter, garlic clove, onion, tomato, bell pepper, jalapeno, pepper, cilantro, and cumin for 10 minutes.  Stir in shredded chicken then briefly saute.  Add tomato sauce, salt and 1/2 cup of chicken broth at a time until the chicken is as juicy as you like.

Saturday, July 17, 2010

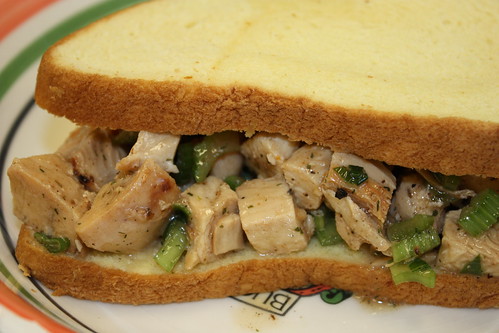
No Mayo Chicken Salad

It's summertime, which means it's camping season!   And it's time to start making some recipes that can be made ahead of time and taken with us on our camping trips.  My husband doesn't like mayo, so this was my solution to a dish usually slathered in it.


No Mayo Chicken Salad
Serves 4

Ingredients:
2 chicken breasts, seasoned and grilled, cooled then cubed
1 (8oz) container of plain yogurt
2 celery stalks, thinly sliced
3 stalks green onion, thinly sliced
1/2 tsp parsley
1/2 tsp dill
1/8 tsp  celery salt
1/4 tsp sea salt


Combine all ingredients together in a medium sized bowl and stir until thoroughly mixed.  Serve on bread for sandwiches or in a bowl for a nice simple lunch dish.  Serve cold.


This recipe could easily be changed up by adding some hard boiled eggs and some diced baby dill pickles to the mix.  Or another version could have diced granny smith apple pieces and sliced grapes.  Adding toasted walnuts to that would be really good too!  Mmmm, I might have to try that one next time.  :)

Monday, July 12, 2010

Chicken, Provolone & Roasted Red Pepper Panini

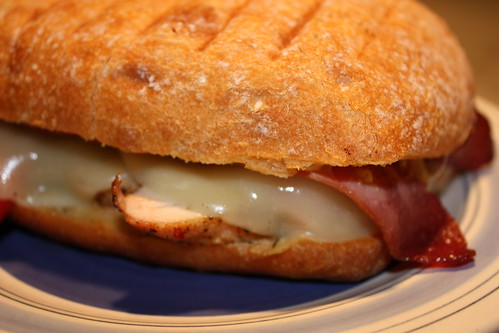
Whenever I have leftover meats from the grill I try to do something new so we aren't necessarily eating the same meal again the next day.  I had a leftover grilled chicken breast from the other night and wanted to try my hand at creating a panini.  And I think it just might be a new addiction. I am definitely going to keep checking out this Panini Blog for inspiration!  All paninis, all the time.


Chicken, Provolone & Roasted Red Pepper Panini
Source: Panini Happy, adapted by Amy's New Kitchen
Serves 4

Ingredients:
1 loaf ciabatta bread
Hummus
Fresh Dill
1 large Chicken Breast, seasoned and grilled, sliced lengthwise
1 Roasted Red Pepper, sliced lengthwise
6 slices deli-style Provolone Cheese
8 slices Turkey Bacon, cooked (optional)


Slice ciabatta loaf in sections perfectly sized to your liking.  Slice in half and spread a generous amount of hummus onto the inside of each slice.  Sprinkle freshly chopped dill onto hummus on both sides of bread again.  Then layer on the bottom slice of ciabatta, chicken, roasted red pepper slices, provolone then bacon.  Top with the top half of ciabatta bread.


Grill sandwiches for ~5 minutes on each side of bread.  The cheese will melt and nice grill marks should form on both sides of the bread.


Look at that gooey awesomeness!!  I used a cast iron grill pan on my stove top and another cast iron pan on top of the sandwiches weigh them down and keep them in place while grilling.  I'm sure it works better if you have a panini press but my way got the job done.  And since it did work- that means I can make grilled paninis any season of the year!

Friday, June 25, 2010

Sloppy Joes

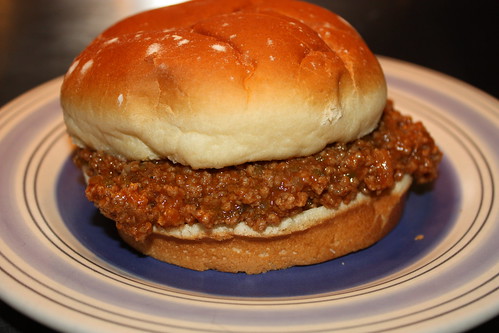
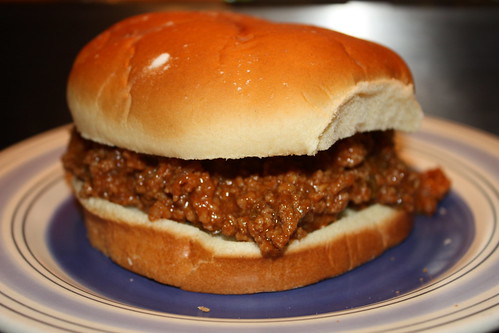
Now I know where they get their name from! Just try and keep the meat from falling out of the bun, I dare you! But seriously-these are awesome. I don't even know the last time I had a Sloppy Joe, but they're delicious and so easy! They're going in to our summer rotation for sure.


Sloppy Joes
original recipe from Allrecipes.com, slightly adapted by Amy's New Kitchen
serves 4

Ingredients:
1 pound lean ground beef
1/2 cup chopped onion
1/2 cup chopped green bell pepper
1/2 teaspoon garlic powder
3/4 cup ketchup
1 tsp prepared yellow mustard
1 tsp spicy brown mustard
1 tsp soy sauce, low sodium
3 teaspoons brown sugar
1 tsp of your favorite hot sauce
salt to taste
freshly ground black pepper to taste

In a medium sauce pan over medium heat, brown the ground beef, onion, and green pepper; drain off any liquids.


Add in garlic powder, ketchup, both mustards, soy sauce, brown sugar, and hot sauce; mix thoroughly. Reduce heat to low and simmer for 30 minutes. Season with salt and pepper.


These would be so easy to make and throw in a slow cooker (on warm) for a party or get together. They have a ton of flavor and are incredibly simple. Great for a quick weeknight meal on a budget too.

Tuesday, June 8, 2010

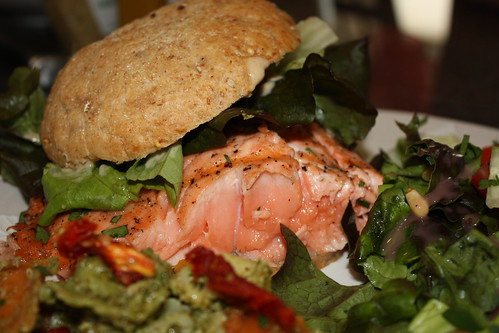
Grilled Glazed Salmon Sandwiches

For Mother's Day my brother and I didn't want to just grill up some chicken and serve it.  We wanted to make something special and colorful-just like our mom.  It just so happens that my trusty subscription of Food & Wine was delivered the day we were talking about what to make!


Grilled Glazed Salmon Sandwiches
recipe from the June 2010 issue of Food & Wine magazine
serves 4

1/4 cup plus 2 Tbsp Dijon Mustard
1/4 cup prepared horseradish, drained
2 Tbsp honey
Four 6 oz skinless salmon fillets
Vegetable oil, for rubbing
Salt
Freshly ground black pepper


In a small bowl, combine the mustard, horseradish, and honey.  
Rub the salmon with oil then season with salt and pepper.  Grill salmon over moderate heat skin side down, until lightly brown.  Rotate and continue grilling until salmon is almost fully cooked through.  Rotate again and brush about 1 Tbsp of the horseradish glaze onto each fillet.   Continue cooking until glaze is set and salmon is done cooking-about 30 seconds and remove from heat.


Serve on a roll with greens of your choice and the rest of the horseradish glaze on the side.


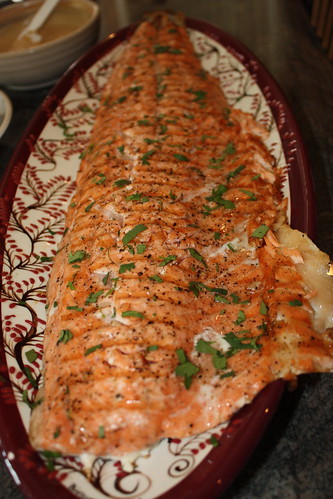
My mom loves salmon.  And I'm not sure how often her and her husband grill it-so I thought this was the perfect meal.  Everyone said it was delicious, and I'll have to take their word for it because I can't eat fish.  Instead of using individual fillets like the recipe suggests, I bought a huge salmon fillet from the deli and we cut each fillet to fit the bread roll.  It worked out really well and the portions were perfect.

Saturday, March 20, 2010

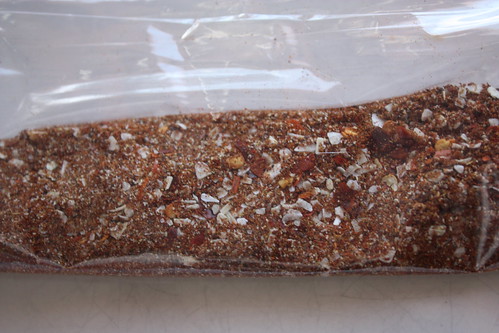
Taco Seasoning

I've started to experiment with making my own taco seasoning since I'm not into paying $1+ for a packet of taco seasoning.  And I usually think there is too much salt in the pre-packaged ones as well.  At least they make low sodium packets now.  Anyway-I've found a mix of seasonings that I'm really liking now.  Here it is:


Taco Seasoning
(This is for 1lb of ground beef or chicken)

Ingredients:
1 Tbsp chili powder
2 tsp minced onions
1 tsp cumin
1 tsp crushed red pepper  (I like to grind them up in my mortar and pestle before I add them to the mix)
1 tsp garlic powder
1/2 tsp paprika
1/2 tsp sea salt
1/2 tsp pepper

Mix all your ingredients together until well blended.  I like to mix them up in my mortar and pestle since it's already out to crush my red pepper flakes even more.  Store in an air-tight container or use immediately.  Use as much or as little as you like.   


Don't forget to drain your meat of all the grease, and also add 3/4 cup water when adding the taco seasoning.  Simmer until water is mostly absorbed and the meat is well seasoned.  

This is a great base for your tacos.  I also like to add a few dashes of our favorite hot sauce onto the meat when I add the spices for a little extra kick.  So yummy!  

Monday, March 8, 2010

Italian Beef Sandwiches

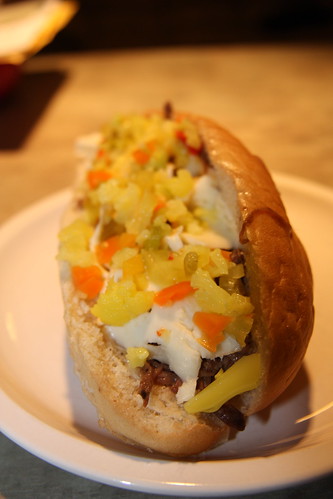
My husband absolutely loves beef sandwiches-Chicago style.  So, I made my way through the many internet recipes for italian beef sandwiches and settled on this one.  And I am so glad that I did.  We loved these!


(Pardon me for not recognizing the source-I didn't print it out with the recipe.  If it is yours, please let me know and I will correct that.)

Italian Beef Sandwiches
Serves 6-8


1 4-5 lb rump roast
1 packet italian salad dressing mix
1 tsp kosher salt
1 tsp fresh cracked pepper
1 tsp basil
1 tsp parsley
1 tsp garlic salt
1 tsp. onion powder
1 bay leaf


In a small saucepan, combine the water along with all the seasonings and the dressing packet.  Stir well and bring to a boil.  Meanwhile-put your roast in the slow cooker and pour the mixture over the roast.  Cover and cook on low for 10-12 hours.  (You could cook it on high for 4-5 hours.)  Remove bay leaf and shred meat.  


Serve on a hoagie topped with some sort of white cheese (provolone is a popular Chicago option, but we used munster and it was delicious!) and giardiniera.  You could also top with some jalapenos or italian sweet peppers.


These were some of the best homemade sandwiches I've ever had.  This recipe also makes a LOT of sammies so invite your friends people.  There's enough for everyone.  Pair it with some french fries and you've got yourself a delicious dinner that didn't take 10 minutes to prep.