Welcome to my kitchen! This is a blog that is evolving as my life does. I like food, but I don't have all the time in the world to cook. So lately, I'm going with simple, easy recipes. I may switch that up occassionally and post something time-intensive, but that isn't what I'm about these days. If that sounds like you - I hope you enjoy some of these recipes.

Showing posts with label cheese. Show all posts

Friday, April 20, 2018

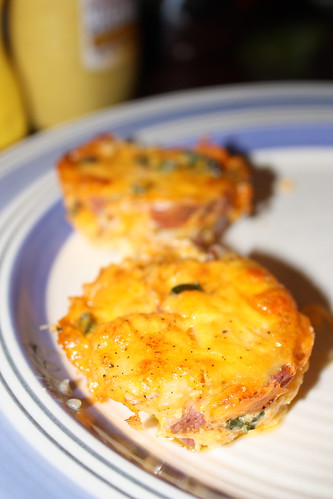
Asparagus and Turkey Bacon Quiche

This was my first quiche and I have to say I like quiche!  It's such an easy and portable breakfast food too.  I made this for a work potluck and it was devoured!  I loved the combination of asparagus and bacon, but you could use ham and broccoli, asparagus and tomatoes, chicken and roasted red pepper-whatever you're feeling!


Asparagus and Turkey Bacon Quiche
source: Allrecipes, slightly adapted by Amy's New Kitchen
serves 8 per quiche, makes 2 full quiche!  :)

Ingredients:


  • 2 unbaked deep dish pie shells
  • 1 pound fresh asparagus, trimmed and cut into 1/2 inch pieces
  • 10 slices turkey bacon
  • 1/4 cup diced green onions
  • 5 eggs
  • 1 1/2 cups half-and-half
  • 1/4 tsp ground nutmeg
  • salt, to taste
  • pepper, to taste
  • 2 cups shredded colby & monterrey jack cheese
Preheat oven to 400.  Pre-bake pie crusts for 10 minutes.


Blanche asparagus by placing in a microwave safe container in a single layer and just covering with water.  Cook on high for 2 minutes.   Remove from water and set aside and let cool.


Cook bacon in a skillet until browned.  Cut into smaller pieces and set aside.


Place asparagus, bacon pieces, and green onions evenly between the 2 pie shells.  Sprinkle cheese on top.  In a bowl beat together eggs, half & half, nutmeg, salt and pepper.  Pour egg mixture evenly on top of cheese.


Bake uncovered for 30-40 minutes until egg mixture is firm and set.  Make sure to check with a toothpick.

This was such a pretty quiche and plates really nicely.  I loved all the colors and flavors in it.  I would highly recommend it if you're feeding a group!

Sunday, November 7, 2010

Ina Garten's Macaroni and Cheese

Sorry for the delay in posting... I haven't been cooking too much lately, other than quite bland foods that sound good to me at the time.  Because - I'm pregnant!  :)  Yay!  Although it doesn't inspire my palate in the least so I have had to cut back on the posting.  I will try my best to keep up better these next few months.

Onward to my first post in 2 months!

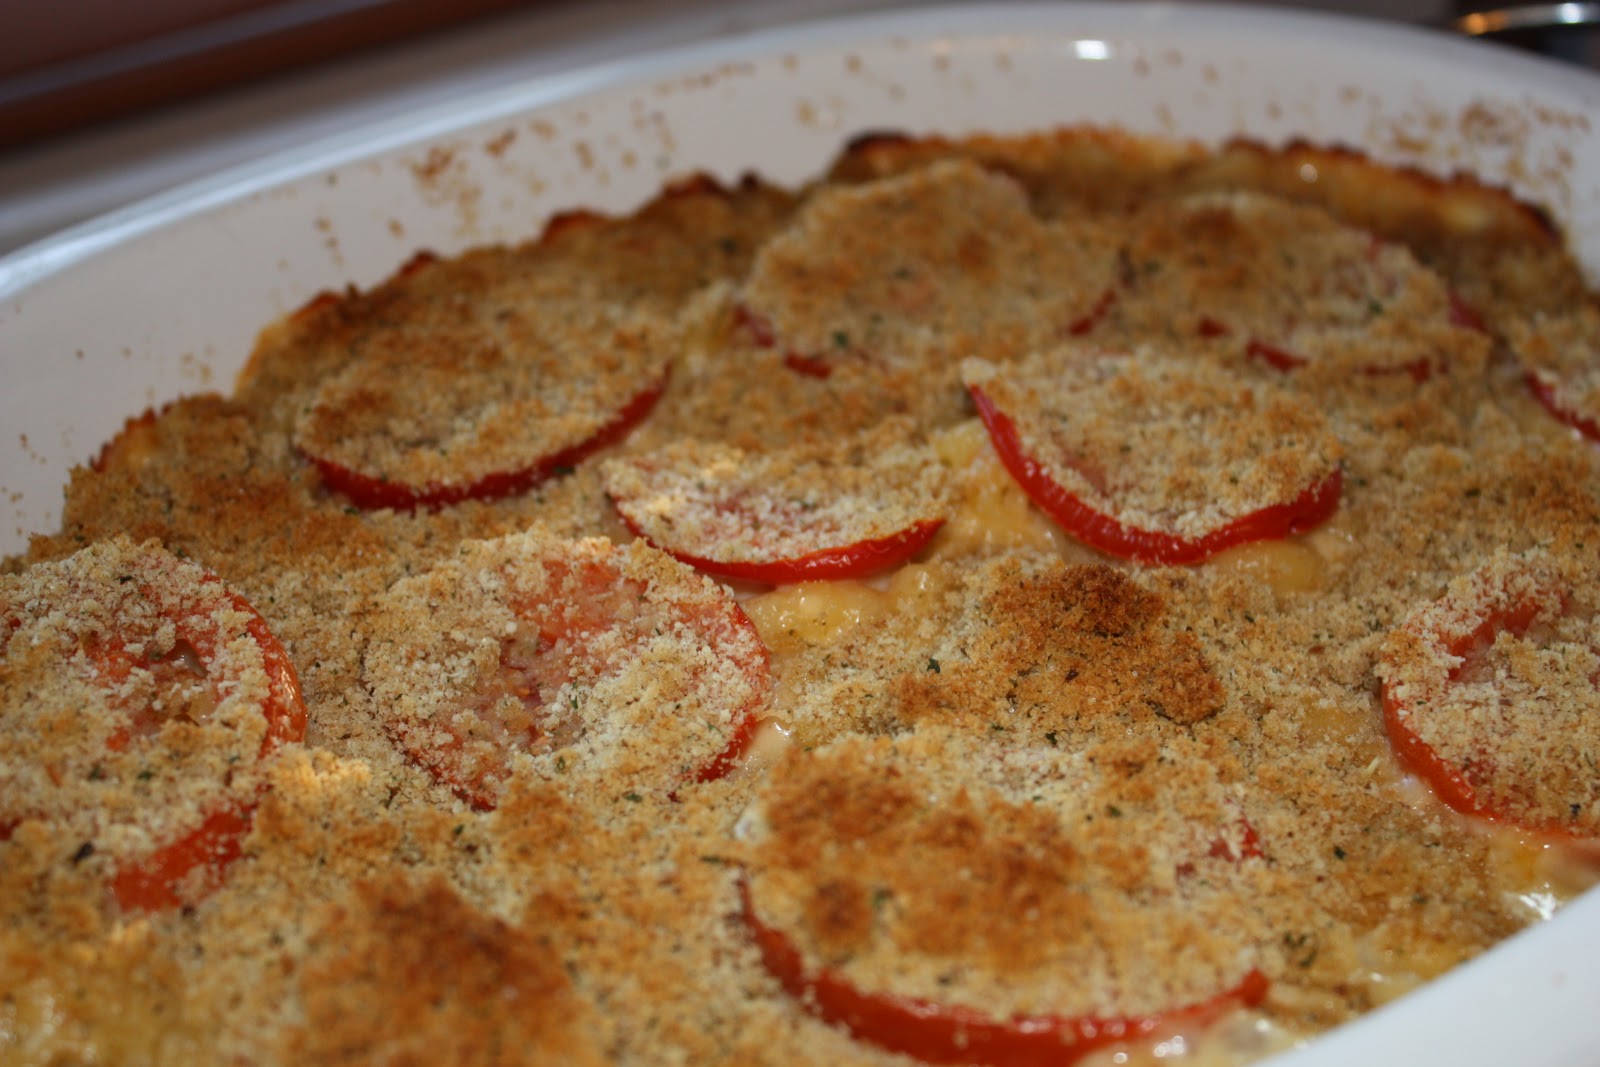
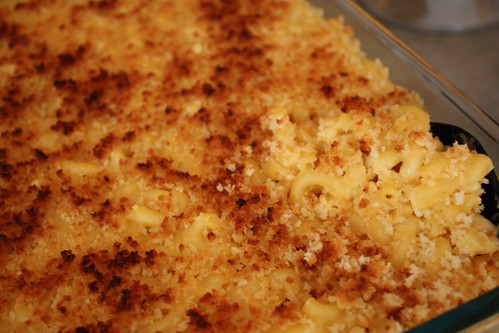
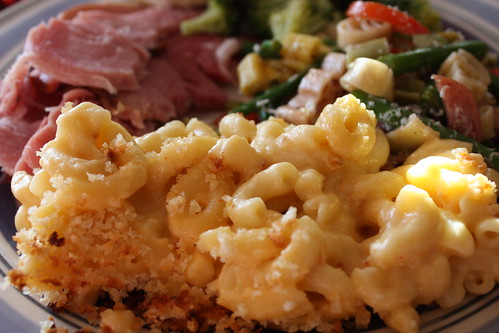
Because I had heard such great things, and because I love mac n' cheese.... I had to make this recipe for my own peace of mind.  And let me tell you - it's good people.  I loved the flavor of the Gruyere cheese and thought it added a twist to your regular mac n' cheese.  The cheese was creamy, and the topping added just enough crunch.  The tomatoes were perfectly cooked and I loved them, but if you didn't they're easy enough to pick out.


Barefoot Contessa Mac and Cheese
source: Foodnetwork.com, slightly adapted by Amy's New Kitchen
Serves 8

Ingredients:
  • Sea salt
  • 1 lb elbow macaroni
  • 1 qt milk
  • 1 stick unsalted butter, divided
  • 1/2 cup all-purpose flour
  • 12 oz Gruyere, grated (4 cups)
  • 8 oz extra-sharp Cheddar, grated (2 cups)
  • 1/2 tsp freshly ground black pepper
  • 1/2 tsp ground nutmeg
  • 4 small fresh tomatoes
  • 1/2 cup bread crumbs or Panko
Preheat oven to 375.


Cook pasta according to directions in salted water.  Al dente is my preference.


While the pasta is cooking, heat the milk in a small saucepan, be careful to keep it from boiling.  Melt 6 Tbsp butter in a large pot and add the flour.  Cook on low heat for 2 minutes and continually stirring with a whisk.  Continue whisking then add in the hot milk and cook until thickened slightly and smooth.  Remove from heat and add the cheeses, 1 Tbsp salt, pepper, and nutmeg.  Add in the cooked macaroni and stir well.  Pour into a baking dish.


Slice the tomatoes and arrange on top of the mac.  Melt the remaining 2 Tbsp of butter and combine with the breadcrumbs and sprinkle evenly over the mac and tomatoes.  Bake for 30 minutes until the cheese is bubbly and the breadcrumbs are slightly browned.


So this is healthy because it has tomatoes in it, right?  :)  Doesn't matter -it's worth all those delicious calories. 

Thursday, July 22, 2010

Stove Top Mac n' Cheese

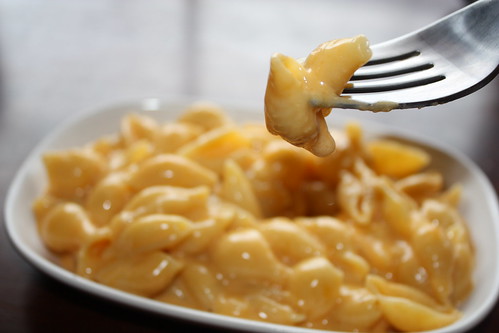
I was looking for a stove top recipe for mac n' cheese because I didn't want to use my oven in this hot, hot summertime heat.  It was suggested by Jen at Beantown Baker that I try Alton Brown's recipe.  She said it was awesome and she was right!  It's the creamiest and easiest macaroni recipe I've ever made and am so happy to have it in my recipe box now!


Alton Brown's Stove Top Mac n' Cheese
Source: Alton Brown, Food Network, slightly adapted by Amy's New Kitchen
Serves: 4

Ingredients:
1/2 lb macaroni (I used shells)
4 Tbsp unsalted butter
2 eggs
6 oz evaporated milk
1/2 tsp hot sauce
1 tsp sea salt
Freshly cracked black pepper, to taste
3/4 tsp dry mustard
8 oz sharp cheddar, shredded
4 oz monterey jack cheese, shredded


In a large pot of boiling, salted water cook the pasta to al dente and drain. Return to the pot and melt in the butter. Toss to coat.

Whisk together the eggs, evaporated milk, hot sauce, salt, pepper, and mustard. Stir into the pasta then add the cheese. Over low heat continue to stir for 3 minutes or until creamy.


I doubled this recipe from the start because I just knew I was going to want leftovers!  I would suggest to everyone, just go ahead and double it-you will wish you had if you didn't!  :)

Monday, July 12, 2010

Chicken, Provolone & Roasted Red Pepper Panini

Whenever I have leftover meats from the grill I try to do something new so we aren't necessarily eating the same meal again the next day.  I had a leftover grilled chicken breast from the other night and wanted to try my hand at creating a panini.  And I think it just might be a new addiction. I am definitely going to keep checking out this Panini Blog for inspiration!  All paninis, all the time.


Chicken, Provolone & Roasted Red Pepper Panini
Source: Panini Happy, adapted by Amy's New Kitchen
Serves 4

Ingredients:
1 loaf ciabatta bread
Hummus
Fresh Dill
1 large Chicken Breast, seasoned and grilled, sliced lengthwise
1 Roasted Red Pepper, sliced lengthwise
6 slices deli-style Provolone Cheese
8 slices Turkey Bacon, cooked (optional)


Slice ciabatta loaf in sections perfectly sized to your liking.  Slice in half and spread a generous amount of hummus onto the inside of each slice.  Sprinkle freshly chopped dill onto hummus on both sides of bread again.  Then layer on the bottom slice of ciabatta, chicken, roasted red pepper slices, provolone then bacon.  Top with the top half of ciabatta bread.


Grill sandwiches for ~5 minutes on each side of bread.  The cheese will melt and nice grill marks should form on both sides of the bread.


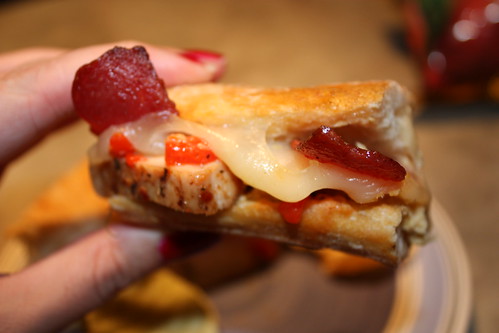
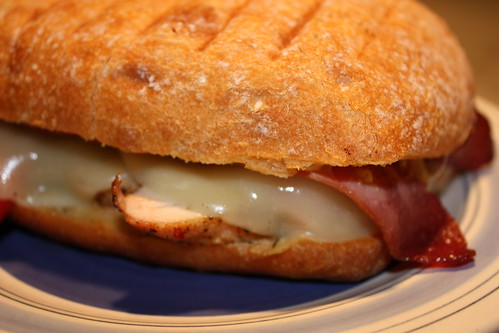
Look at that gooey awesomeness!!  I used a cast iron grill pan on my stove top and another cast iron pan on top of the sandwiches weigh them down and keep them in place while grilling.  I'm sure it works better if you have a panini press but my way got the job done.  And since it did work- that means I can make grilled paninis any season of the year!

Friday, July 2, 2010

Garlic Cheddar Biscuits

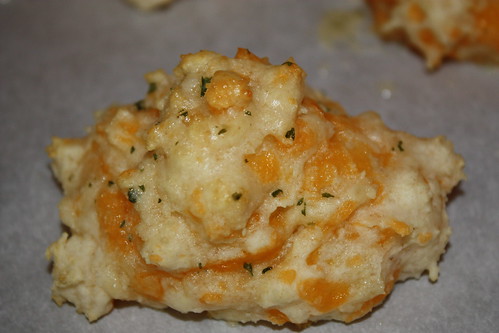
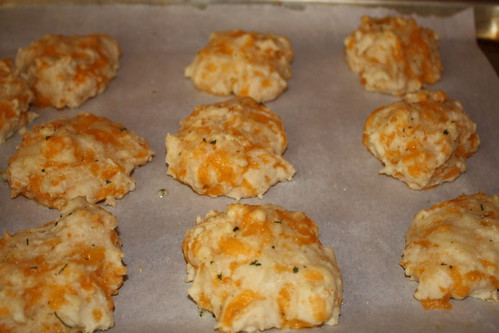
Why do people go to Red Lobster?  For those amazing cheddar biscuits of course!  Well, I know that's why I go anyway.  Since I'm allergic to seafood - it's pretty much my only option on their menu.  So when I heard of recipes out there that are damn close to the real thing, I jumped on that grenade.


Garlic Cheddar Biscuits
Source: Paula Deen, God love her.
servings: 12 biscuits


Biscuit Ingredients:
1 1/4 cup biscuit mix
1/2 cup sharp cheddar cheese, grated
1/2 cup water


Garlic Butter Ingredients:
1/2 stick unsalted butter, melted
1/4 tsp garlic powder
1/4 tsp sea salt
1/8 tsp dried parsley flakes


Preheat oven to 400ยบ.  Line a baking sheet with parchment paper.


Combine the biscuit mix and cheese in a small bowl.  Add the water and stir until just combined.  Drop the dough by the spoonful onto the parchement paper.  Bake for 10 minutes.  The biscuits will just be beginning to brown.


Meanwhile, while the biscuits are baking, make the garlic butter by combining the melted butter, garlic powder, salt and parsley in a small bowl.  As soon as the biscuits are removed from the oven brush each with the garlic butter.  Serve warm.


These were amazing!  They were the first thing at dinner that everyone sunk their teeth into.  And between 5 people, there weren't any left by the end of the meal.

And on that note-it's time to get out of Dodge.  It's the July 4th weekend and we're getting out of here!  Camping here we come.   I hope everyone has a safe and happy 4th and thank you to all the soldiers for keeping us free and independent!

Biscuit Method on Foodista

Tuesday, June 29, 2010

Cheddar Stuffed Jalapenos

My brother, dad and husband are big fans of peppers.  Most of the time, the hotter the better.  So for Father's Day, I decided to make some stuffed jalapenos for my bro and my dad.  And I guess Jeffrey too since he is a doggy dad!

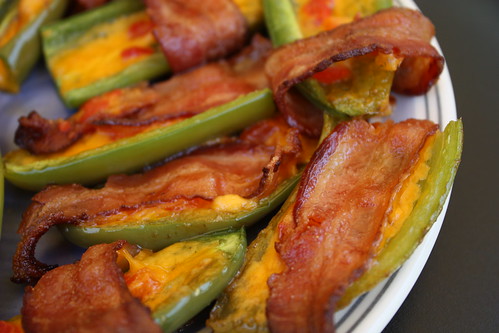
The only problem with most recipes is that they all involve cream cheese.  An ingredient that Jeff does not approve of.  So, I made up my own and they were a hit!  My 8 year old nephew even loved them-always a bonus!  And they're colorful-which is just they way I like it.


Cheddar Cheese Stuffed Jalapenos 
Servings: 6; 2 per serving

Ingredients:
6 slices bacon
6 jalapenos
4 oz sharp cheddar cheese
2 Tbsp pimentos
Garlic powder


Partially cook bacon slices, side by side, in oven for 8 minutes at 400ยบ on a shallow, rimmed baking sheet.  Do not discard the bacon grease.  Cut each slice of bacon in half and let cool.  Turn oven heat up to 450ยบ.


Split jalapenos in half, lengthwise (removing the stems or not depending on preference), and remove seeds and membranes.  Fill each half of jalapeno with a thick piece of cheese cut to fit jalapeno.  Add pimentos on top, sprinkle with garlic powder and wrap in ½ a piece of bacon, or lay bacon slice on top of jalapeno.  If wrapping in bacon, lay the seams of bacon underneath each jalapeno to keep in place on baking sheet; if necessary secure with a toothpick.  Place closely together on baking sheet (with bacon grease) and bake in oven for 10-12 minutes or until bacon is nice and crisp.


For a spicier pepper leave the membranes in each jalapeno.


These were fun and easy.  But here's a word of warning.....your hands will remain spiced like a jalapeno for hours.  Don't touch your eyes or they will burn!  Trust me.  Next time I will be wearing latex gloves when cutting up the jalapenos.  You better believe it!

Tuesday, May 11, 2010

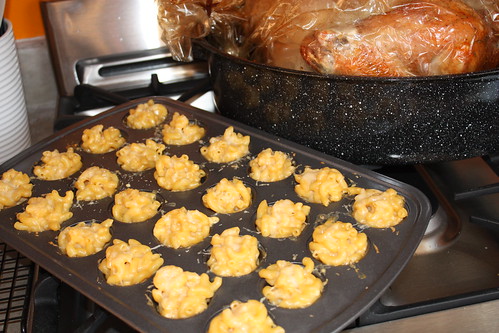
Mini Mac n' Cheese Bites

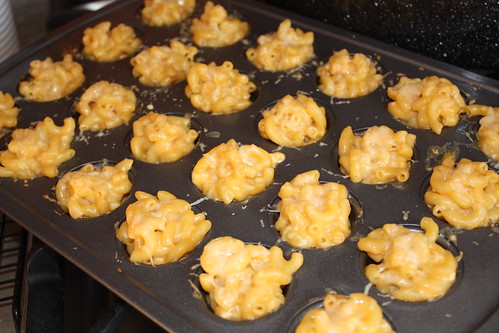
When I heard there was a such a thing as bite size Mac N' Cheese appetizers I knew I had to make them.  I'm a sucker for a good macaroni and cheese recipe so I love new ways to make it.  This original recipe is from Food & Wine magazine.


Mini Mac n' Cheese Bites
Recipe from Food & Wine Magazine-December 2007 publication
Serves 8

Ingredients:
1/2 lb elbow macaroni
1 1/2 Tbsp unsalted butter, extra for brushing
1/4 cup Parmigian-Reggiano cheese, freshly grated
2 Tbsp all purpose flour
3/4 cup milk
3 oz blue cheese
1 cup cheddar cheese, shredded
4 oz deli sliced American cheese, chopped
1 large egg yolk
1/4 tsp smoked paprika


Preheat the oven to 425°. In a large saucepan of boiling salted water, cook the macaroni until al dente, about 5 minutes. Drain, shaking off the excess water.


Brush two 24-cup, nonstick mini muffin tins with butter. Sprinkle with 2 tablespoons of the Parmigiano; tap out the excess.


In a large saucepan, melt the 1 1/2 tablespoons of butter. Whisk in the flour over moderate heat for 2 minutes. Whisk in the milk and cook, whisking, until boiling, about 5 minutes. Add the cheddar, American and blue cheeses and whisk until melted. Off the heat, whisk in the egg yolk and paprika. Fold in the macaroni.


Spoon slightly rounded tablespoons of the macaroni into the prepared muffin cups, packing them gently. Sprinkle the remaining 2 tablespoons of Parmigiano on top.


Bake the mini macs in the upper and middle thirds of the oven for about 10 minutes, until golden and sizzling. Let cool for 5-6 min­utes. Using a small spoon, carefully loosen the mini macs, transfer to a platter and serve.


We made this recipe as an appetizer to our Thanksgiving feast.  Everyone thought they were super tasty.  I think adding the blue cheese really made them a bit more exotic and special.  What a fun way to bring Mac and Cheese to any meal!

Thursday, April 22, 2010

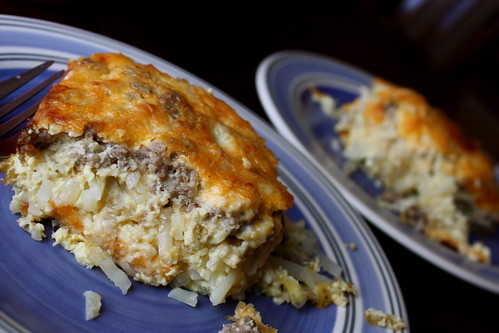
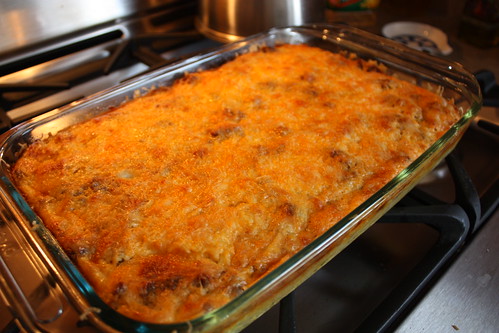
Sausage, Egg and Hash Brown Bake

I find something comforting about a hot breakfast casserole in the morning.  And nothing fits that bill like a good, classic sausage bake on my breakfast table (or better yet-breakfast in bed) and a hot cup of coffee to go along with it!  The only problem with them is that most recipes I've come across use sour cream.  An ingredient the husband does not like.  I needed to use up the fresh hash browns that I had bought-so I was off to the great wide internet to find a recipe that he would enjoy too.  I came across this recipe at Allrecipes.com and it is fantastic.  Classic, flavorful and feeds plenty.  Perfect.


Sausage, Egg and Hash Brown Bake
Original recipe from Allrecipes.com, slightly adapted by Amy's New Kitchen
Serves 8

Ingredients:
1 package (2lbs) frozen hash browns, thawed (or 1 pkg fresh hash browns)
1 Tbsp canola oil
1 lb breakfast sausage
1 shallot, finely diced
9 eggs
1/2 cup milk
1/2 tsp onion powder
1/2 tsp garlic powder
1/8 tsp salt
1 tsp freshly cracked black pepper
12 oz cheddar cheese, shredded


Heat a skillet over medium heat and add 1 Tbsp oil.  When hot add 1/2 the hash browns and cook until slightly crisp.


Preheat oven to 350 degrees F. Grease a 9x13 baking dish. Place the crisp hash browns in the bottom of the baking dish, then add the rest on top. 


In that same skillet over medium heat cook the sausage and shallot until the sausage is crumbly, evenly browned, and no longer pink; drain. Meanwhile, whisk together the eggs, milk, onion powder, garlic powder, salt and pepper, and pour over the potatoes. Layer with 1/4 of the cheddar cheese, the sausage mixture, and then top with remaining Cheddar cheese. Cover with aluminum foil. 


Bake for 1 hour. Remove cover; return casserole to the oven and bake until cheese turns slightly crisp, about 5-10 minutes. Let stand for 5 minutes before serving. 


The cheese comes out crunchy and delicious, while the layers underneath hold such a nice flavor that you can't even wait to take your next bite.  This was chowed down by my 8 year old nephew-so it has to be good!  ;) 

Monday, April 19, 2010

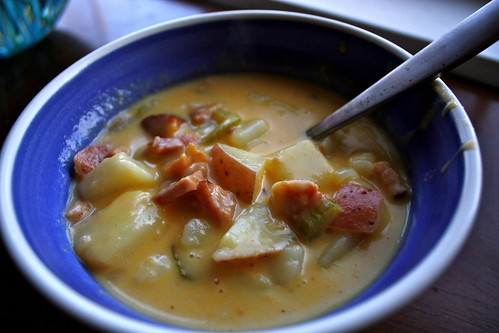
Cheesy Potato and Ham Soup

I wanted a satisfying, warm soup one cold night so we decided to try this recipe out.  And we've made it twice since.  It is also a nice way to use up that left over New Year's or Easter ham!  The inspiration for this dish came from a recipe at Allrecipes.com called Golden Potato Soup.


Cheesy Potato and Ham Soup
Serves 8

Ingredients:
3 1/2 cups potatoes, peeled (if you like) and cubed
1/2 cup celery, chopped
1/3 cup onion, finely chopped
2 Tbsp chicken bouillon granules or 1 chicken bouillon cube
3 cups water
1 Tbsp dried parsley
1/2 tsp sea salt
1 Tbsp freshly cracked black pepper
1 tsp cayenne pepper
5 Tbsp flour
5 Tbsp butter
2 cups milk
2 cups cheddar cheese, shredded
2 cups ham, cooked and diced


Combine the potatoes, celery, onion, ham and water in a large pot and bring to a boil.  Cook over medium to medium-high heat until the potatoes are tender.  Add in the chicken bouillon granules along with the salt, pepper, and cayenne pepper - stir.


In a separate large pot (I like to use my dutch oven), melt butter over medium heat and whisk in your flour until a nice roux forms.  Add in the parsley and stir.  Slowly pour in the milk while continuing to whisk so that no clumps form.  Continue stirring constantly until mixture thickens. (Just a few minutes)


Add the cheese slowly and stir until completely melted.  Add the potatoes, ham, and water mixture to the cheese.  Stir until your soup is well blended.


The first time I made this soup I peeled the potatoes.  Just for fun-the second time I made it, I used New Potatoes and didn't peel them.  It was good both ways, but the peeled potatoes definitely made a more traditional soup.  But I like the color the New Potato peels provide when you don't peel them.
Either way-this is a comforting dinner that we will make again and again on those cold winter nights!

Thursday, April 8, 2010

Individual Scalloped Potatoes

These little guys are so fun and easy!  We made them as a side dish with our brats for my dad's birthday dinner and they were devoured in no time.  I don't even really like potatoes, and I thought they were great.  I guess a stick of butter does make everything taste better.  Thanks Paula Deen!  ;)

I found this recipe at The Tasty Kitchen.  Yum!


Individual Scalloped Potatoes
12 servings, 2 each


8 Whole Medium Potatoes
1 Stick Butter
2 cups Shredded Cheddar Cheese
3/4 cup Diced Scallions
24 tsp Half & Half
Sea Salt
Fresh Cracked Pepper


Pierce each potato with a fork, sprinkle with salt and wrap in a damp paper towel and microwave on high for 15 minutes.  Potatoes should still be firm.  Set aside to cool until they can be handled, then slice.  


Place 1 pat of butter in the bottom of each mold of 2 muffin/cupcake pans, then a slice of potato, add a pinch of salt and pepper, then cheese and scallions.  Repeat layers so you have at least 3.  They will condense down-so don't worry if they don't quite fit.  Top each mold with another small pat of butter and drizzle each with 1 tsp of half & half.


Bake at 400 degrees for 20 minutes.  The cheese will be melted and potatoes will be crispy on the edges and brown.


If you need to use up some of that leftover Easter ham- dice it up and add it to the mix.  It would be delicious.  I should have made more because between 4 boys...I didn't have any left.  But I'm glad my dad enjoyed his birthday dinner.  And I'm extra glad I found this tasty recipe.

Tuesday, April 6, 2010

Classic Mac n' Cheese

Who doesn't like Mac N' Cheese?  No one I know!  This recipe from Cook's Illustrated is exactly what I think of, when I think of a "Classic" Macaroni and Cheese.


Classic Macaroni & Cheese
Recipe from Cook's Illustrated, slightly adapted


Bread Crumb Topping:
6 Slices White Sandwich Bread (good-quality, about 6oz) torn into rough pieces
3 Tbsp cold unsalted butter, cut into 6 pieces


Pasta and Cheese Ingredients:
1 pound Elbow Macaroni
1 Tbsp Table Salt (I used Sea Salt)
5 Tbsp Unsalted Butter
6 Tbsp All-Purpose Flour
1 1/2 tsp Powdered Mustard
1/4 tsp Cayenne Pepper 
5 cups Milk
8oz Monterey Jack Cheese, shredded
8oz Sharp Cheddar Cheese, shredded
1 tsp Table Salt (I used Sea Salt)


1. For the bread crumb topping: Pulse bread pieces and butter in a food processor until crumbs are no larger than 1/8 inch.  (10-15 one second pulses.)  Set aside.  (I used 3/4 cup Panko bread crumbs mixed with 2 Tbsp melted butter since I didn't have bread in the house.)


2.  Bring 4 quarts water to a boil in a Dutch Oven and add macaroni along with 1 Tbsp salt; cook until pasta is al dente.  Drain pasta and set aside in colander.


3. Adjust oven rack to lower-middle position and heat broiler.


4. Wipe out now empty Dutch Oven, add butter and cook over medium high heat until foaming.  Add the flour, mustard, and cayenne pepper and whisk until mixture becomes fragrant and deepens in color, approx. 1 minute.  Gradually whisk in milk and bring mixture to a boil, whisking constantly.  Make sure mixture reaches full boil to thicken fully.  Reduce heat to medium and simmer, whisking occasionally, until consistency is of heavy cream.  (Approx. 5 minutes)  Off heat, whisk in cheeses and 1 tsp salt until cheeses are fully melted and creamy.  Add pasta and continue to cook over medium-low heat, stirring constantly,  until heated through.


5. Transfer mixture to a broiler safe 9x13" baking dish and sprinkle bread crumb topping evenly on top.  Broil for 4 minutes until bread crumbs are crisp and golden brown.  Cool 5 minutes, then serve.


We had this with our Easter dinner and everyone raved about it.  The bread crumbs really sealed the deal-making this the hit side dish of the evening.  I would make this dish again for any occasion.  The only thing I would have preferred is to add some fresh cracked pepper onto the mixture before adding the bread crumbs on top and possibly increasing the amount of bread crumb topping.  And I think I will stick with the Panko.  It was perfect.

Wednesday, March 10, 2010

Cheesy Artichoke Triangles

As promised, here are the Pampered Chef, Cheesy Artichoke Triangles that I made for an appetizer for Valentine's Day.  My Grandma gave me a PC recipe book while we were in Texas visiting her last December.  Which is great because I've got a PC Stoneware Bar Pan that needs using!


This recipe was fairly easy actually.  Highly recommended.


Cheesy Artichoke Triangles
Serves: 24 appetizers


2 pkgs (8 oz) refrigerated crescent rolls
2 pkgs (8 oz) lowfat cream cheese, softened
1 lemon
2 eggs
1 clove garlic, pressed
1 can (14 oz) artichoke hearts in water, drained and finely chopped
1 cup (4 oz) parmesan cheese, freshly grated, divided
2 plum tomatos, sliced
2 tbsp chopped fresh parsley
1/2 tsp coarsely ground black pepper


Preheat oven to 375 degrees.  Unroll one package of crescent rolls across one end of the pan.  Repeat with 2nd package of dough on other side of pan.  Roll dough to seal the seam and press dough up and all along the edges of the pan to form the "crust."  Bake 10-12 minutes or until light golden brown and remove from oven.


Meanwhile, cream the cream cheese in mixer until smooth.  Zest lemon for 1 tsp zest.  Add lemon zest, eggs, and garlic to cream cheese.  Mix.  Add finely chopped artichokes and 1/2 cup of the parmesan cheese to cream cheese mixture, mix well.


Spread the artichoke mixture evenly over the crust; arrange tomato slices over filling.  Combine the remaining parmesan cheese, parsley, and pepper in a separate bowl.  Sprinkle mixture on the top of your filling.


Bake 25-30 minutes until light golden brown and set.  Remove from oven and cool 10 minutes.  Cut into 12 squares; cut each square in half diagonally.  


These are absolutely delicious!!  My husband is not a fan of cream cheese and even he loved these.  They make such a nice looking appetizer and are even good heated up afterwards.   I just toasted them up in the toaster oven and they were almost as good as new.

Sunday, February 28, 2010

Cheesy Egg Bake

This is my go-to breakfast bake.  I love it.  There are so many variations that you can do with it too, which is another reason to love it.  It is simple, tasty, and makes your kitchen smell amazing when it's cooking.


Cheesy Egg Bake
Serves 8


Ingredients
12 eggs
1/3 cup low-fat sour cream
8 oz fully cooked ham, diced
1 small bell pepper, chopped
1/2 medium yellow onion, chopped
3/4 cup chopped tomatoes
1 small can diced green chiles
8 oz monterey jack, shredded
8 oz medium sharp cheddar, shredded
Salt
Pepper


Preheat oven to 400 degrees.  Beat eggs and sour cream with whisk until blended.  Pour egg mixture into greased 9x13" baking dish and bake for 10 minutes.  (Until eggs are starting to set.)


While that is baking-sweat bell pepper and onions in a skillet on medium-high heat until onions are soft.


When eggs have cooked 10 minutes, remove from oven and reduce heat in oven to 325 degrees.  Sprinkle tomatoes, ham, diced green chiles and bell pepper and onions on to the eggs.  Add salt and pepper to your liking.  Cover with the shredded cheese and continue baking for 30 more minutes.


Substitutions you can make:
-Sausage for ham (add it before you add the bell peppers and tomatoes to your skillet.  Cook until slightly browning-add bell peppers and onions and cook until sausage is fully browned - drain)
-You can use a can of Rotel tomatoes instead of fresh-just be sure to drain them first
-Any of your favorite cheeses can be used.  I usually use what we have on hand.  Today-it was Monterey Jack and Cheddar.