Welcome to my kitchen! This is a blog that is evolving as my life does. I like food, but I don't have all the time in the world to cook. So lately, I'm going with simple, easy recipes. I may switch that up occassionally and post something time-intensive, but that isn't what I'm about these days. If that sounds like you - I hope you enjoy some of these recipes.

Wednesday, May 26, 2010

Caramel Apple Pecan Pie

I made this for our Thanksgiving dessert solely because caramel apples remind me of fall.  But this would be good any time of the year.  It's such a fun twist on your average apple pie and was really easy to make.  Plus, it looks fancy!


I found this recipe here at Good Morning America.  I didn't even know they had recipes at good ol' GMA, but I will make sure to check there more often because this pie was mouth-watering delicious! 

Caramel Apple Pecan Pie
Serves 6-8

Ingredients:


  • 7 cups tart apples, sliced and peeled


  • 1 teaspoon lemon juice


  • 1 teaspoon vanilla extract


  • 3/4 cup pecans, chopped


  • 1/3 cup brown sugar, packed


  • 3 tablespoons sugar


  • 4-1/2 teaspoons cinnamon, ground


  • 1 tablespoon cornstarch


  • 1/4 cup caramel ice-cream topping, room temperature


  •  2 pastry shells, unbaked (9 inches) 


  • 3 tablespoons butter, melted


  • For Streusel Topping:


  • 3/4 cup flour, all-purpose


  • 2/3 cup pecans, chopped


  • 1/4 cup sugar


  • 6 tablespoons butter, cold


  • 1/4 cup caramel ice-cream topping, room temperature


  •  
    In a large bowl, toss apples with lemon juice and vanilla.

    Combine the pecans, sugars, cinnamon and cornstarch; add to apple mixture and toss to coat.

    Pour caramel topping over bottom of pastry shell; top with apple mixture (shell will be full). Drizzle with butter.

    In a small bowl, combine the flour, pecans and sugar. Cut in butter until mixture resembles coarse crumbs. Sprinkle over filling.

    Bake at 350° for 55-65 minutes or until filling is bubbly and topping is browned.  Immediately drizzle with caramel topping. Cool on a wire rack.


    This recipe says it makes one pie......but when I made it-I had enough of everything for 2!  BONUS!  :)  So I made 2 pies, and was really glad I did because I've never seen so many people eat that much pie in my life.  This recipe is definitely a winner.

    See?  Here is my brother resource guarding to prove it......

    Monday, May 17, 2010

    Apricot Ginger Glaze for Ham

    I wanted to do something a little different for our Easter Ham this year rather than the usual brown sugar glaze....and I was pointed in the direction of this Mango Ginger Glaze and was intrigued. I couldn't find a few of the ingredients so I turned that recipe into an Apricot Ginger Glaze and it was still amazing. So tasty.


    Apricot Ginger Glaze
    Original recipe from Steamy Kitchen, slightly adapted by Amy's New Kitchen

    1/2 cup apricot nectar or juice

    1 1/2 cups apricot jam
    3/4 cup light brown sugar
    1 1/2 teaspoons peeled and grated fresh ginger
    1/2 teaspoon ground cloves

    Combine the apricot nectar, jam, brown sugar, ginger and cloves in a small pot and cook over low heat until the glaze is thick and sticky.

    I also cooked my ham just as the Steamy Kitchen recommended.  In a roasting pan actually, with about 2 cups of the apricot nectar in the bottom of the pan.  Covered in foil for 15min/lb on 275 degrees.  I took the ham out about 10 minutes before it should have been done (at 110 degrees internal temp) and then added a layer of the glaze all over the outside of the ham and continued cooking uncovered for an additional 10 minutes at 350 degrees.  It turned out moist and flavorful! 


    The glaze was such a fun and colorful addition to the dinner plates and everyone loved it.  It is always a gamble when adding something different to what is normally a traditional meal, but I was glad I changed it up a little this year.  We will make this glaze year after year from now on.

    Wednesday, May 12, 2010

    Grandpa's Goulash

    I miss my Grandpa.  He passed away when I was little.  There are 2 things that I remember about my Grandpa though.  He made me sausage and eggs for lunch almost every single day I saw him, and he made the best goulash.  My mom recently brought over her recipe box of family recipes for me to go through and copy the ones I wanted.  Grandpa's Goulash was the first one I hunted down.  One other thing about my Grandpa though-all his recipes are to taste.  No measurements.  So, I will be experimenting until I get them all right.  And I will share the love of my Grandpa with all of you!


    Goulash
    Serves 8

    Ingredients:
    2 lb 93% lean Ground Beef
    1 lb Shell Macaroni
    Sea Salt
    Pepper
    1 Tbsp Garlic Powder
    1/4 cup A-1 Steak Sauce
    1/4 cup Heinz 57 Sauce
    2-3 Tbsp of your favorite hot sauce
    1 Tbsp Worcestershire Sauce
    1 28oz can Petite Diced Tomatoes
    1 6oz can Tomato Paste


    Cook pasta as directed on package in salted water.  While the pasta is cooking, salt and pepper then start browning the meat in a large pot.  When meat is slightly browned, add garlic powder, A-1, Heinz 57, hot sauce, Worcestershire sauce, and the entire can of tomatoes with juices.  Continue cooking until meat is thoroughly cooked then simmer.  Add can of tomato paste and blend completely into the meat mixture.  Drain shells, do not rinse them, then add them to the meat mixture.  Let simmer about 30 minutes to let the flavors blend.


    I really needed some comfort food tonight.  It's currently raining outside and it's about to start snowing....yep-almost halfway through May.  I'm ready for summertime!  But until mother nature is too, I will use this rainy day to make some amazing food that warms my heart....and my belly.

    Tuesday, May 11, 2010

    Mini Mac n' Cheese Bites

    When I heard there was a such a thing as bite size Mac N' Cheese appetizers I knew I had to make them.  I'm a sucker for a good macaroni and cheese recipe so I love new ways to make it.  This original recipe is from Food & Wine magazine.


    Mini Mac n' Cheese Bites
    Recipe from Food & Wine Magazine-December 2007 publication
    Serves 8

    Ingredients:
    1/2 lb elbow macaroni
    1 1/2 Tbsp unsalted butter, extra for brushing
    1/4 cup Parmigian-Reggiano cheese, freshly grated
    2 Tbsp all purpose flour
    3/4 cup milk
    3 oz blue cheese
    1 cup cheddar cheese, shredded
    4 oz deli sliced American cheese, chopped
    1 large egg yolk
    1/4 tsp smoked paprika


    Preheat the oven to 425°. In a large saucepan of boiling salted water, cook the macaroni until al dente, about 5 minutes. Drain, shaking off the excess water.


    Brush two 24-cup, nonstick mini muffin tins with butter. Sprinkle with 2 tablespoons of the Parmigiano; tap out the excess.


    In a large saucepan, melt the 1 1/2 tablespoons of butter. Whisk in the flour over moderate heat for 2 minutes. Whisk in the milk and cook, whisking, until boiling, about 5 minutes. Add the cheddar, American and blue cheeses and whisk until melted. Off the heat, whisk in the egg yolk and paprika. Fold in the macaroni.


    Spoon slightly rounded tablespoons of the macaroni into the prepared muffin cups, packing them gently. Sprinkle the remaining 2 tablespoons of Parmigiano on top.


    Bake the mini macs in the upper and middle thirds of the oven for about 10 minutes, until golden and sizzling. Let cool for 5-6 min­utes. Using a small spoon, carefully loosen the mini macs, transfer to a platter and serve.


    We made this recipe as an appetizer to our Thanksgiving feast.  Everyone thought they were super tasty.  I think adding the blue cheese really made them a bit more exotic and special.  What a fun way to bring Mac and Cheese to any meal!

    Friday, May 7, 2010

    Bacon-Wrapped Pork Medallions in Red Wine and Rosemary Sauce

    There is a judge frequently on Iron Chef America who swears that bacon makes everything taste better.  I wanted to test that theory so I bought 4 packages of bacon the last time I was at the grocery store.  Ok, not just because of the judge on Iron Chef America-but because it was on sale, BOGO, and I eat turkey bacon and Jeff likes the regular stuff.  Ok, OK, I admit we might have a problem.  Let's figure out a way to solve it....  Pork wrapped in bacon!!  Jeff always says there is nothing better for dinner than meat and meat!


    Bacon-Wrapped Pork Medallions with Red Wine and Rosemary Sauce
    adapted from Cook's Illustrated, The New Best Recipe by way of Pink Parsley

    Ingredients:
    1 pork tenderloin, trimmed of excess fat (mine was 1.5lbs)
    sea salt
    pepper
    10 slices bacon, thick cut or Applewood smoked
    1 Tbsp olive oil
    3/4 red wine
    2/3 cup low-sodium chicken broth
    2 tsp rosemary
    1 bay leaf

    Arrange bacon in a single layer on a cooling rack that is placed on top of a baking sheet with 4 sides.  Bake at 400 degrees for 13 minutes.  Remove from oven, blot excess grease with a paper towel and let cool on cooling rack.

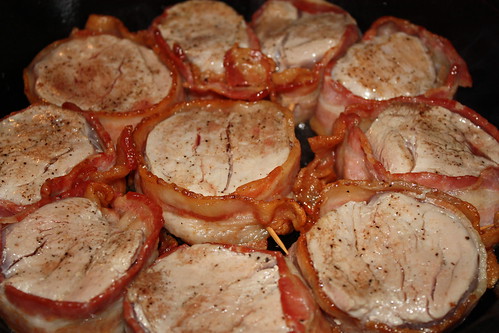
    Meanwhile, slice the tenderloin into 1" thick pieces.  Season both sides with salt and pepper and then wrap each medallion with one slice of bacon.  Secure bacon with a toothpick.

    Heat oil in cast iron skillet until you see light whisps of smoke come from the oil.  Sear medallions until nicely browned on each side, about 2 minutes per side.  Feel free to do these in batches if they don't all fit in your pan.  Transfer medallions to a plate.

    In the same skillet over medium-high heat, pour in the wine (I used a Malbec).  Cook, scraping the browned bits from the bottom of the pan with a wooden spoon, until the wine has reduced to about 2-3 Tablespoons.  This took me about 6-7 minutes.

    Increase heat to high and add the chicken broth, rosemary and bay leaf to the reduced wine sauce.  Cook until this sauce is reduced to a thicker consistency, about 3-5 minutes.  Place the pork medallions back in the wine sauce, and add any juices from the plate as well.  Continue cooking, about 3 minutes, to heat and cook the pork through, turning once to coat each medallion with the sauce.

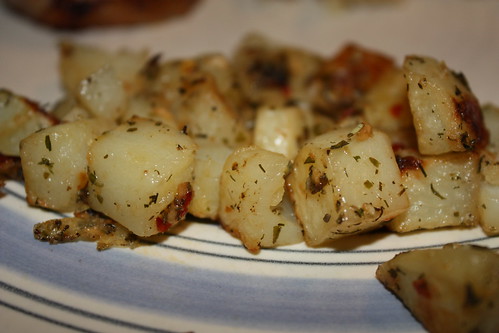
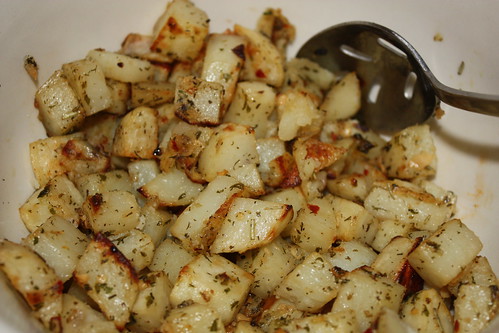
    Transfer to a plate, remove the toothpicks, spoon additional sauce over each piece if you like and serve immediately with your favorite sides. 

    The meat smelled delicious while cooking.  The medallions went from this:

    To this:

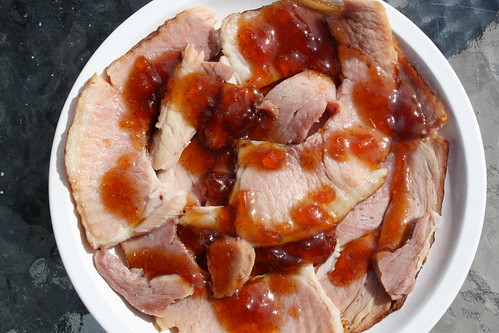
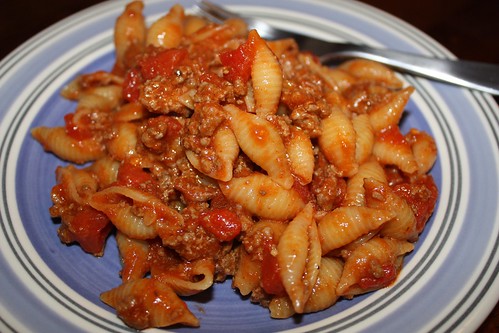
    To served up in the sauce on a plate:

    The meat was so tender.  I didn't even think that pork could become that tender from being cooked on the stove top in such a short amount of time, but it was absolutely melt-in-your-mouth delicious.  I will be making this dish again and again and again.  We loved every bite.

    From the original recipe I omitted the cherries completely, substituting a bay leaf instead and altered the cooking times slightly.  I'm not sure if it was the higher altitude, but the times needed extending for the pork to cook through fully.

    Wednesday, May 5, 2010

    Herb Roasted Potatoes

    I love those little cubed potatoes they have at some breakfast restaurants.  Le Peep is one I can think of where I can't leave a potato behind!  I like making my own because you can make them a little spicier than restaurants usually do.  These are a bit spicy, not overly so, and delicious with breakfast, lunch, or dinner. 


    Herb Roasted Potatoes
    Recipe adapted from this recipe at Allrecipes.com
    Serves 6

    Ingredients:
    4 large potatoes, peeled and cubed
    1/8 cup olive oil
    1 Tbsp minced garlic
    1/2 tsp basil
    1/2 tsp dill weed
    1/2 tsp oregano
    1/2 tsp parsley
    1/2 tsp crushed red pepper flakes
    1 tsp salt

    Preheat oven to 450 degrees.  Mix oil and all spices together in a large sized bowl.  Add peeled and cubed potatoes and mix until potatoes are completely coated with oil mixture.  Add more oil if necessary.  Place potatoes in a single layer on a baking sheet and bake for 10 minutes.

    Take potatoes out and increase oven temp to 475 degrees.  Turn potatoes over and continue cooking for an additional 10-15 minutes until nicely browned.  I recommend flipping one more time if you have to cook them longer than 10 minutes.