Welcome to my kitchen! This is a blog that is evolving as my life does. I like food, but I don't have all the time in the world to cook. So lately, I'm going with simple, easy recipes. I may switch that up occassionally and post something time-intensive, but that isn't what I'm about these days. If that sounds like you - I hope you enjoy some of these recipes.

Thursday, July 29, 2010

Sweet n' Spicy Zucchini Pickles

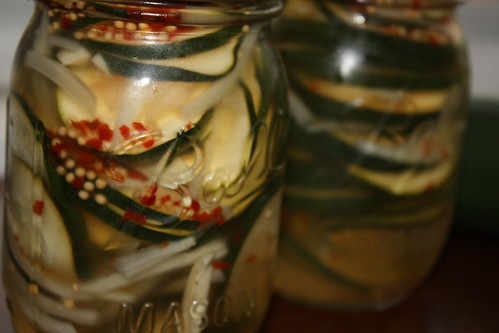
There are lots of recipes out there for zucchini, but plenty of them involve baking or frying.  Neither of which I was up for the other night, so when I found this recipe for Sweet n' Spicy Zucchini Pickles in the latest issue of Cooking Light I was excited!  I hadn't heard of zucchini pickles before but they sounded like fun to me so I made them.  Why not?  They're yummy and totally delicious by themselves as a light snack or on hamburgers or anything that you would use regular pickles for with an extra kick! 


Sweet n' Spicy Zucchini Pickles
source: Cooking Light, August 2010 issue
serves: makes full 2 Ball jars of pickles

Ingredients:
4 cups zucchini, sliced in 1/8" slices
1 cup sweet onions, slivered
3 garlic cloves, thinly sliced
1 cup white vinegar
1/2 cup sugar
3/4 tsp crushed red pepper flakes
1 tsp mustard seeds
3/4 tsp sea salt


Combine vinegar, sugar, red pepper flakes, mustard seeds and salt in a small sauce pan.  Bring to a boil.  While mixture is coming to a boil combine zucchini, onions, garlic in 2 Ball jars.  Pour half the vinegar mixture over the zucchini in each jar.  Fill the rest of the way up with water and refrigerate for at least 24 hours before serving. 


These pickles are so pretty!

These zucchini pickles don't give off their heat right away, but after chewing for a few seconds you will feel the kick!  Then the sweet kicks back in and the flavor that is left in your mouth is fresh and summery.

Wednesday, July 28, 2010

London Broil with Cherry Balsamic Sauce

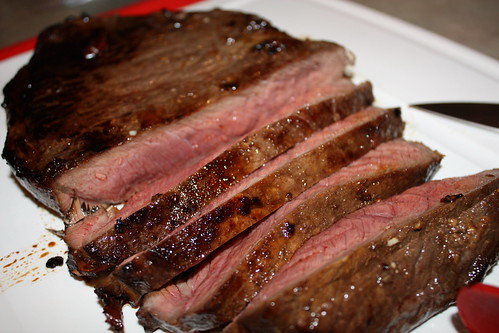
This was a great dinner to make on a weeknight.  Because it's easy, quick, and filling!  The sauce is absolutely delicious and compliments the meat perfectly.


London Broil with Cherry Balsamic Sauce
Source: Food Network
Serves 6

Ingredients:
(I recommend doubling this top batch of ingredients and then dividing them)
1/3 cup, dry red wine
1/4 cup balsamic vinigar
2 Tbsp cherry preserves
2 cloves garlic, minced
1/2 tsp sea salt
Freshly ground black pepper, to taste


1 1/2 lbs London Broil
1 shallot, finely chopped
1 tsp olive oil
2 tsp butter


Whisk wine, vinegar, cherry preserves, garlic, salt and pepper in a small bowl. Place meat in a shallow glass dish. Pour the marinade over the meat and turn to coat. Cover and marinate in the refrigerator, turning several times, for at least 1 hour (or up to 8 hours).


Remove the meat from the marinade. Pour the marinade into a small saucepan (I made a second batch and threw this original marinade away); add shallot and set aside. Oil a cast iron skillet and heat on medium-high. Add the meat and cook for 6 to 8 minutes per side for medium-rare, or until it reaches desired doneness. (Cooking time will depend on thickness.  It may appear that the meat is burning but don't worry, it will form a pleasant crust.) Transfer meat to a cutting board and let rest for 5-10 minutes.


While the meat is cooking, bring the marinade to a boil.  Cook over medium-high heat for 5 to 7 minutes, or until it is reduced to about 1/2 cup. Remove from the heat; add butter and whisk until melted.


Slice meat thinly against the grain. Add any juices on the cutting board to the sauce. Serve the meat with the sauce drizzled on top.


This was really great and serves plenty!  I love doing London Broils because start to finish (not including the marinade time which I recommend doing for as long as you can.  It will really help this tough cut of meat to tenderize and become that much more flavorful!) this meal takes less than 30 minutes.  It doesn't get much easier than that and it tastes amazing.  The flavors really mesh in the sauce and makes the house smell spectacular.

Sunday, July 25, 2010

Grilled Artichokes with Lemon Mayonnaise Dip

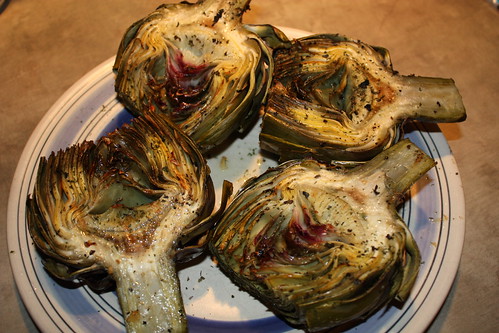
The only way to make an artichoke any more delicious is to grill it.  Jeff and I love to eat out at a restaurant here in Denver called the Cherry Creek Grill.  They have the most amazing seasonal grilled artichokes on their menu and I've always wanted to recreate them at home.  (Although whatever sauce they use is absolutely amazing and I have no idea what is in it.  I will have to see if the waiter will give me some insight next time we're there.)


Grilled Artichokes
Serves 4

Ingredients:
2 cloves garlic
1 bay leaf


2 large artichokes
garlic powder
parsley
sea salt
freshly ground black pepper
1 lemon, halved
olive oil for drizzling


Fill a large pot with about 1" of water and add the garlic cloves and bay leaf to the water.  Place a steamer basket in the water and bring to a boil.


While waiting for the water to boil, prepare the artichokes by washing them then cutting about 1/4" off the end of each stem.  If you like, you can use a vegetable peeler to peel the tough outer layer of the stems away.  Cut about an inch off the tops and trim the pointy tips of the leaves with kitchen shears. 


Place on steamer basket and steam for 20-30 minutes depending on size of artichoke.  You will be able to insert a knife easily into the end of the stem when they are done.  Remove from the pot and set aside to cool for about 10 minutes.  Cut in halves or quarters depending on how many people you will be serving.  Using a sharp knife remove the choke and any purple leaves on the inside of each artichoke.


Preheat your grill.  I like the flavor of a charcoal grill but a gas grill works just fine.  Lightly spread leaves apart and sprinkle garlic powder, parsley, salt and pepper in between the leaves and on the inside.  Squeeze fresh lemon juice on top and drizzle the flat parts of each artichoke with olive oil. 


Grill the artichokes leaf-side down.  Then turn them over and grill just until the tips of the leaves char a little and get some flavor to them.  Remove and serve immediately(with lemon mayonnaise!).

(I forgot to cut out the chokes and inside leaves before we grilled these, so I just did it afterward.)


Lemon Mayonnaise 
Source: Emeril Lagasse, Food Network, slightly adapted by Amy's New Kitchen
Serves: 6-8 portions

2 lemons, halved
1 large egg*
2-3 Tbsp water
1/2 cup olive oil
1/2 cup vegetable oil
1/2 tsp salt
1/2 tsp cayenne


Squeeze the lemon juice into the bowl of a small food processor.  Add the egg* and 1 Tbsp water and process for 20 seconds.  With the processor running slowly pour in the olive oil and vegetable oil through the feed tube and process until emulsified.  (Add additional water, 1 Tbsp at a time to thin the mayo if you like.)  Add the salt and cayenne, pulse to blend.  Transfer to an airtight container and refrigerate for at least an hour before serving.  (Mayo can be refrigerated for up to 24 hours.)

*RAW EGG WARNING (from FoodNetwork.com)
Food Network Kitchens suggest caution in consuming raw and lightly-cooked eggs due to the slight risk of Salmonella or other food-borne illness. To reduce this risk, we recommend you use only fresh, properly-refrigerated, clean, grade A or AA eggs with intact shells, and avoid contact between the yolks or whites and the shell.